If you aren't using the Get Started tutorial, use the following instructions to create a cluster, connect to your database, explore distributed SQL, and build an application.
Create your Sandbox cluster
The Sandbox cluster provides a fully functioning single node YugabyteDB cluster deployed to the region of your choice. The cluster is free forever and includes enough resources to explore the core features available for developing applications with YugabyteDB. No credit card information is required.
Sandbox cluster
YugabyteDB is a distributed database optimized for deployment across a cluster of servers. The Sandbox cluster has a single node and limited resources, suitable for running tutorials, Yugabyte University, and building sample applications. See Differences between Sandbox and Dedicated clusters for more information.
To evaluate YugabyteDB Aeon for production use or conduct a proof-of-concept (POC), contact Yugabyte Support for trial credits.
To create your Sandbox cluster:

-
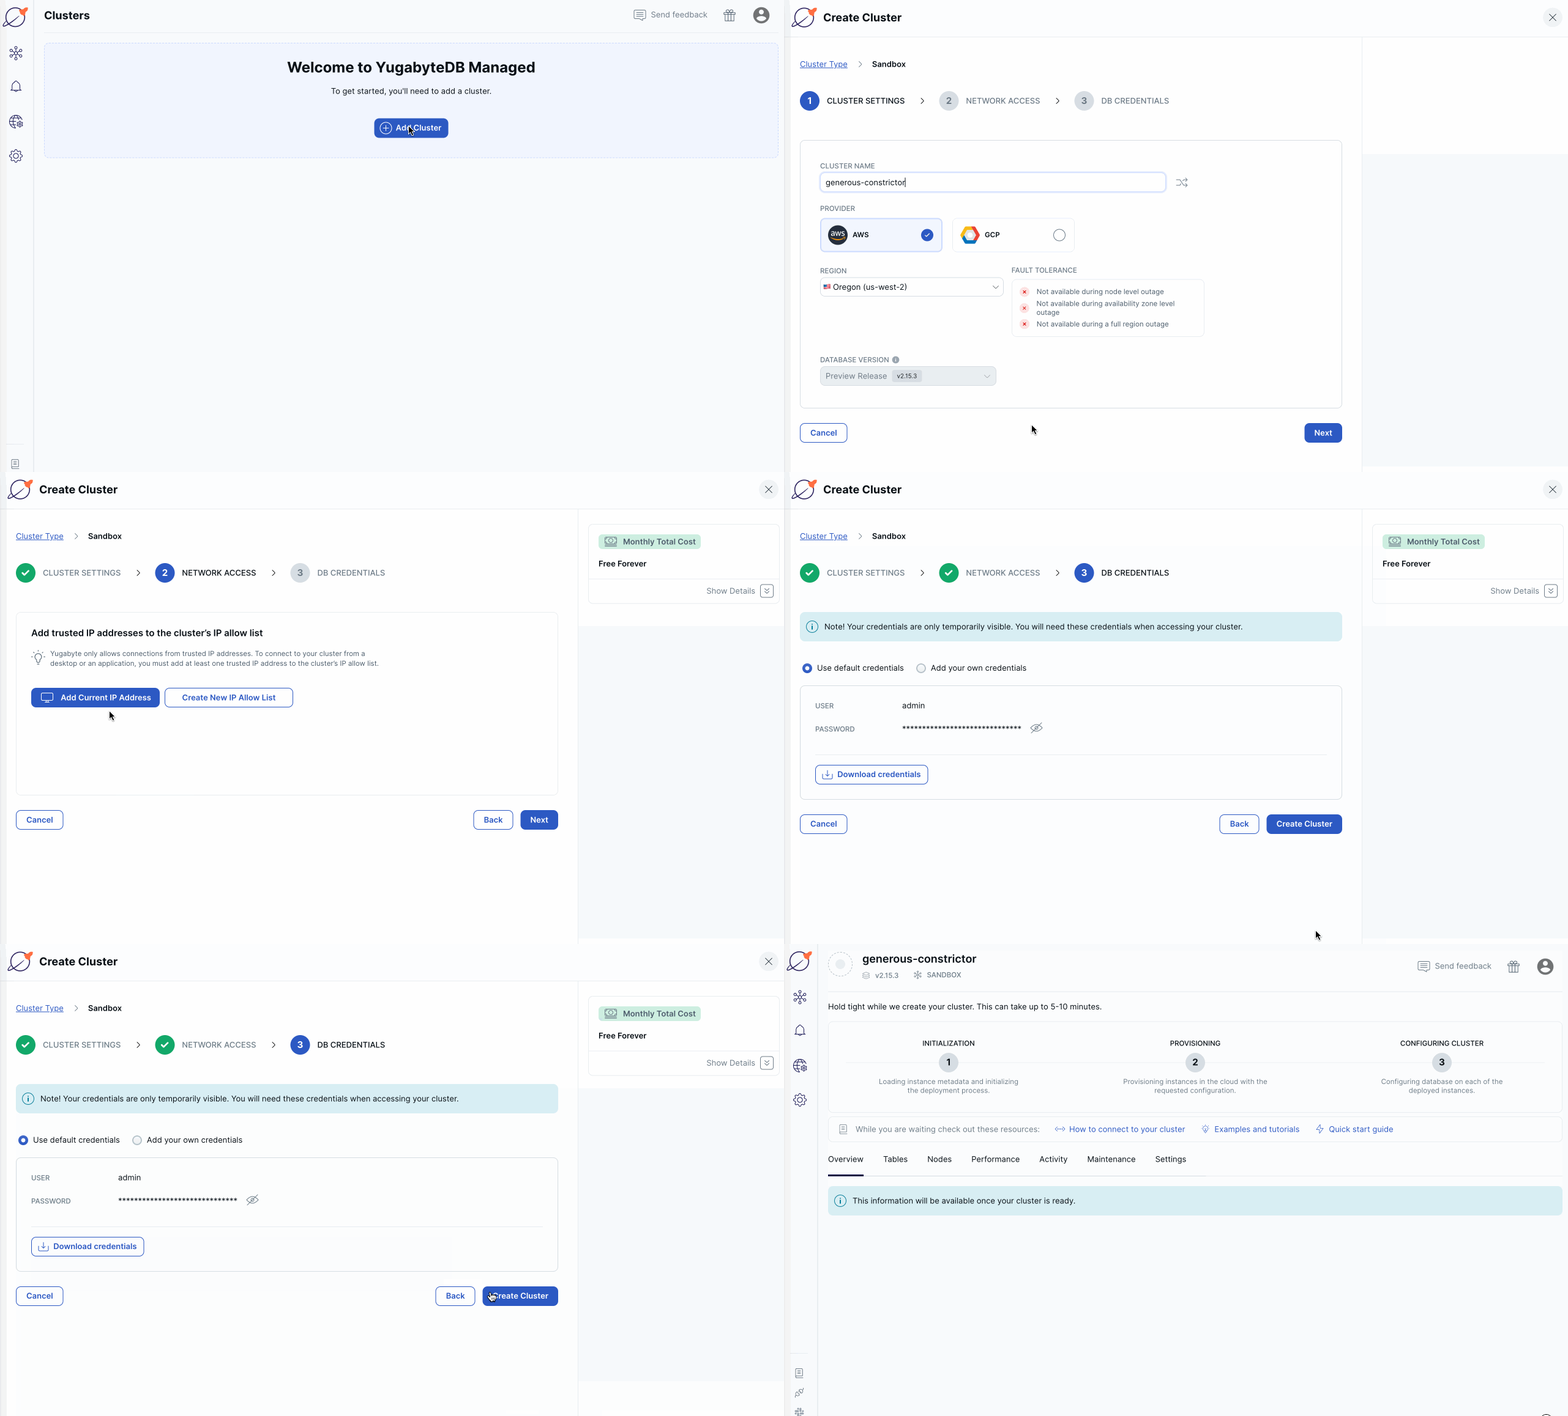
Click Create a Free cluster on the welcome screen, or click Add Cluster on the Clusters page to open the Create Cluster wizard.
-
Select Sandbox and click Choose.
-
Enter a name for the cluster, choose the cloud provider (AWS or GCP), and choose the region in which to deploy the cluster, then click Next.
-
Click Add Current IP Address. The IP address of your machine is added to the IP allow list. This allows you to connect to your sandbox cluster from applications and your desktop after it is created.
-
Click Next.
-
Click Download credentials. The default credentials are for a database user named "admin". You'll use these credentials when connecting to your YugabyteDB database.
-
Click Create Cluster.
YugabyteDB Aeon bootstraps and provisions the cluster, and configures YugabyteDB. The process takes around 5 minutes. While you wait, you can optionally fill out a survey to customize your getting started experience.
When the cluster is ready, the cluster Overview is displayed. You now have a fully configured YugabyteDB cluster provisioned in YugabyteDB Aeon.
Connect to the cluster
Use Cloud Shell to connect to your YugabyteDB Aeon cluster from your browser, and interact with it using distributed SQL.
The shell has a one hour connection limit. If your session is idle for more than 5 minutes, it may disconnect. If your session expires, close your browser tab and connect again.
To connect to your cluster, do the following:

-
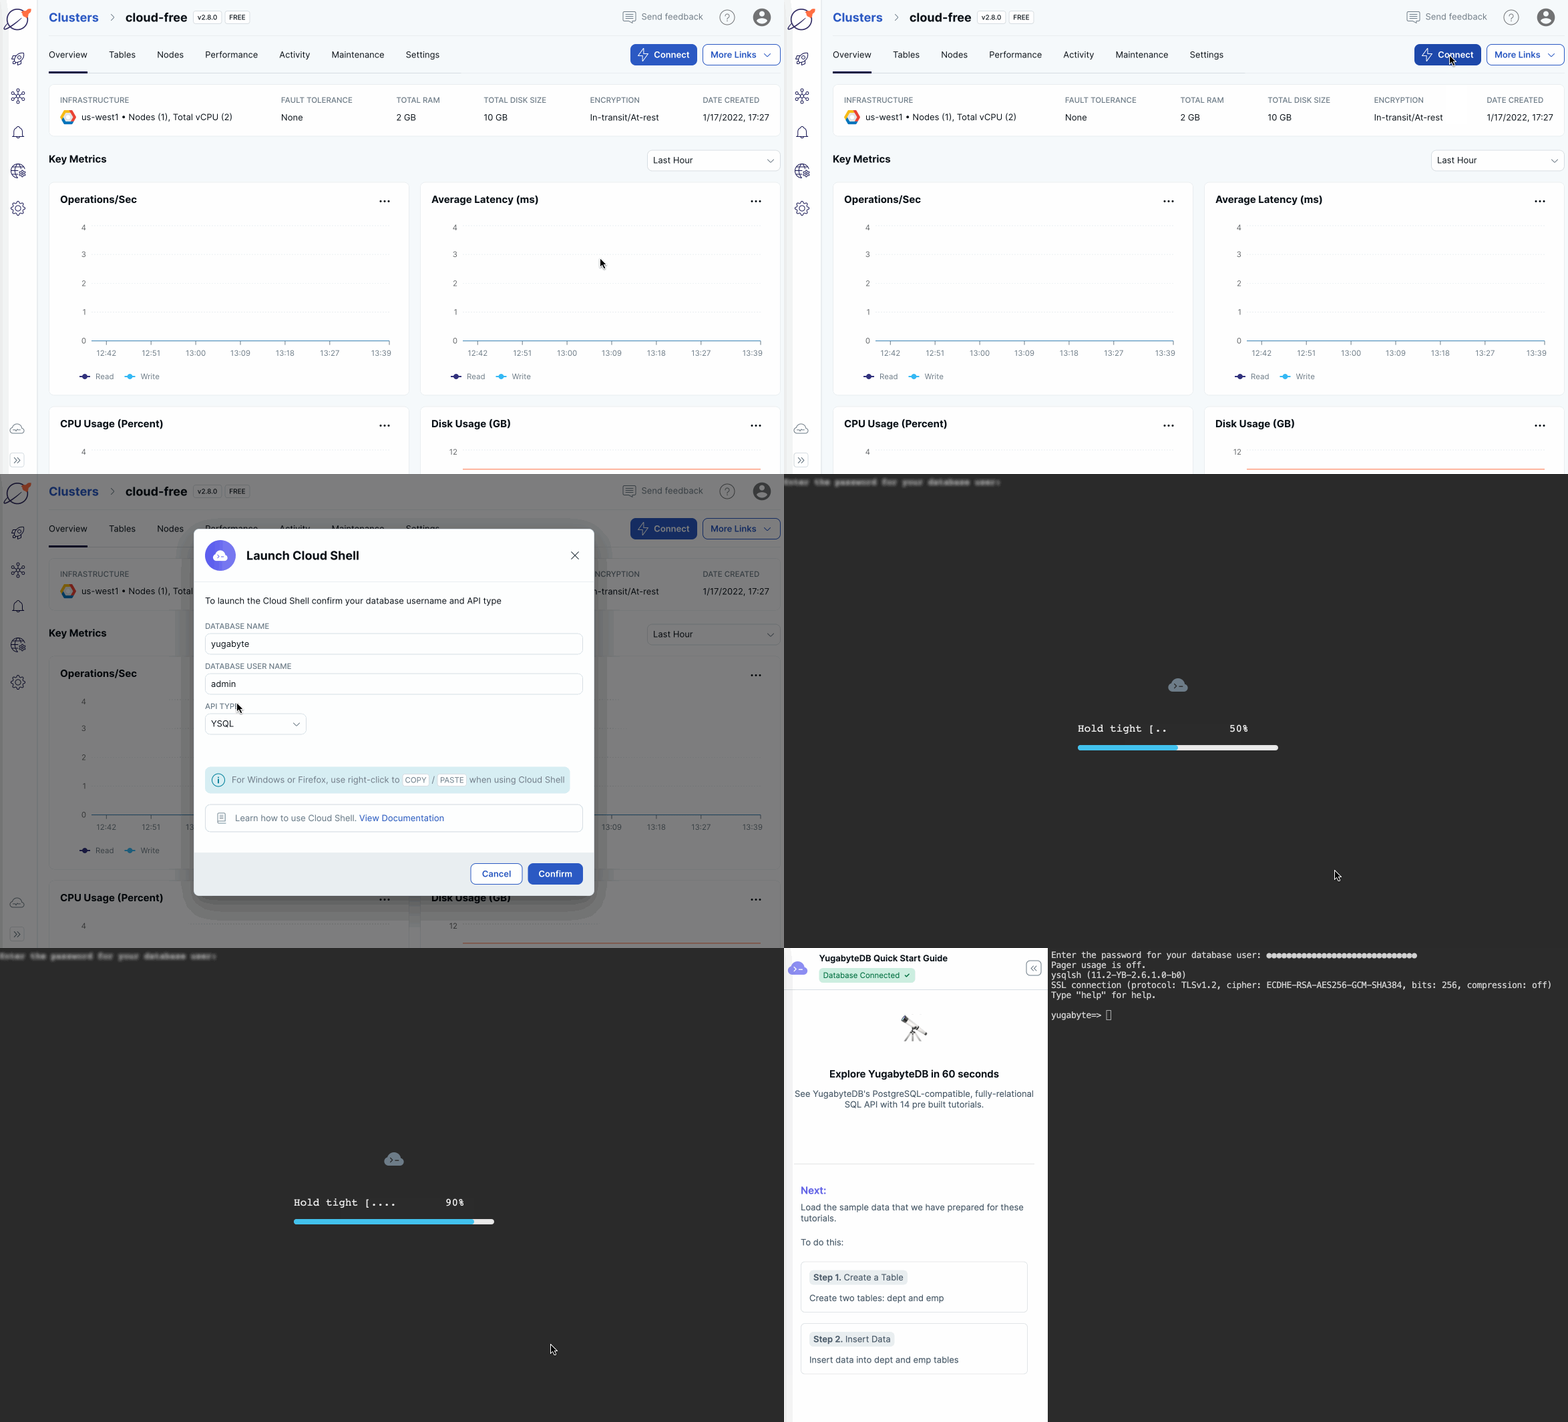
On the Clusters page, ensure your cluster is selected.
-
Click Connect to display the Connect to Cluster dialog.
-
Under Cloud Shell, click Launch Cloud Shell.
-
Enter the database name (
yugabyte), the user name (admin), select the YSQL API type, and click Confirm.Cloud Shell opens in a separate browser window. Cloud Shell can take up to 30 seconds to be ready.
Enter your DB password: -
Enter the password for the admin user credentials that you saved when you created the cluster.\
The shell prompt appears and is ready to use.
ysqlsh (15.2-YB-2.25.2.0-b0)
SSL connection (protocol: TLSv1.2, cipher: ECDHE-RSA-AES256-GCM-SHA384, bits: 256, compression: off)
Type "help" for help.

yugabyte=>
The command line interface (CLI) being used is called ysqlsh. ysqlsh is the CLI for interacting with YugabyteDB using the PostgreSQL-compatible YSQL API. Cloud Shell also supports ycqlsh, a CLI for the YCQL API.
For information on other ways to connect to your cluster, refer to Connect to clusters.
Explore distributed SQL
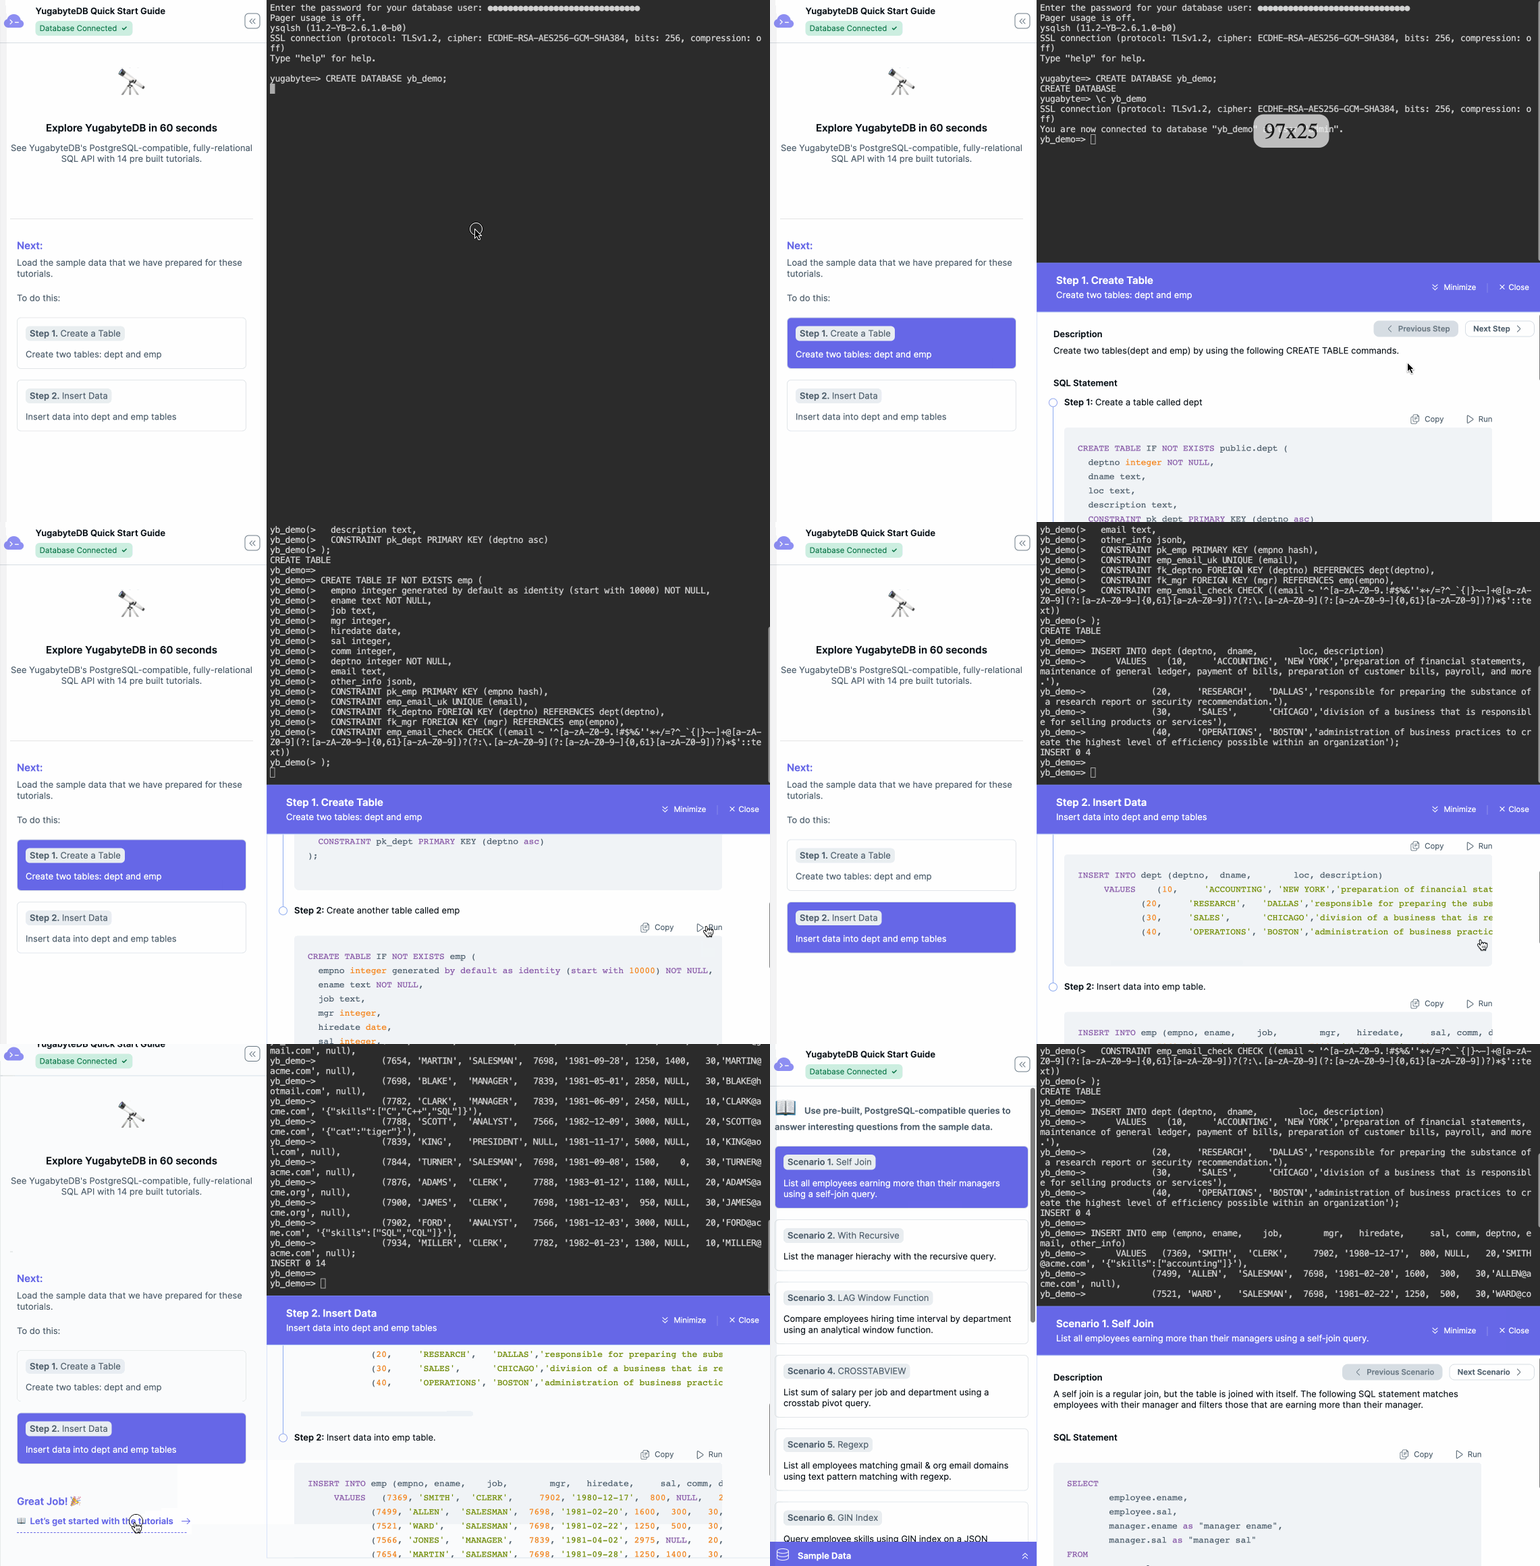
When you connect to your cluster using Cloud Shell with the YSQL API (the default), the shell window incorporates a Quick Start Guide, with a series of pre-built queries for you to run. Follow the prompts to explore YugabyteDB in 5 minutes.

Build an application
Applications connect to and interact with YugabyteDB using API client libraries (also known as client drivers). The tutorials in this section show how to connect applications to YugabyteDB Aeon clusters using your favorite programming language.
Before you begin, you need the following:
- a cluster deployed in YugabyteDB Aeon.
- the cluster CA certificate; YugabyteDB Aeon uses TLS to secure connections to the database.
- your computer added to the cluster IP allow list.
Refer to Before you begin.