Develop secure applications with Azure Private Link
YugabyteDB provides multiple networking options to ensure security, reliability, and improved latencies. Virtual Private Clouds (VPC) can be connected through a VPC peering connection to keep network traffic in a cloud provider's network, bypassing the public internet. This allows applications running in Google Cloud or AWS to connect to YugabyteDB as if they were in the same network.
In Azure, you can achieve a similar result using Private Service Endpoints. To illustrate this point, let's securely connect a Node.js application in Azure to a cluster running in YugabyteDB Aeon.
In the following sections, you will:
- Deploy and configure a YugabyteDB cluster in a VNet in Azure.
- Create and configure a virtual machine in a VNet in Azure.
- Set up the private link between the application and database.
- Run a Node.js application in the virtual machine in Azure.
Prerequisites
- A YugabyteDB Aeon account. Sign up for a free trial.
- An Azure Cloud account with permission to create services.
Get started with YugabyteDB Aeon
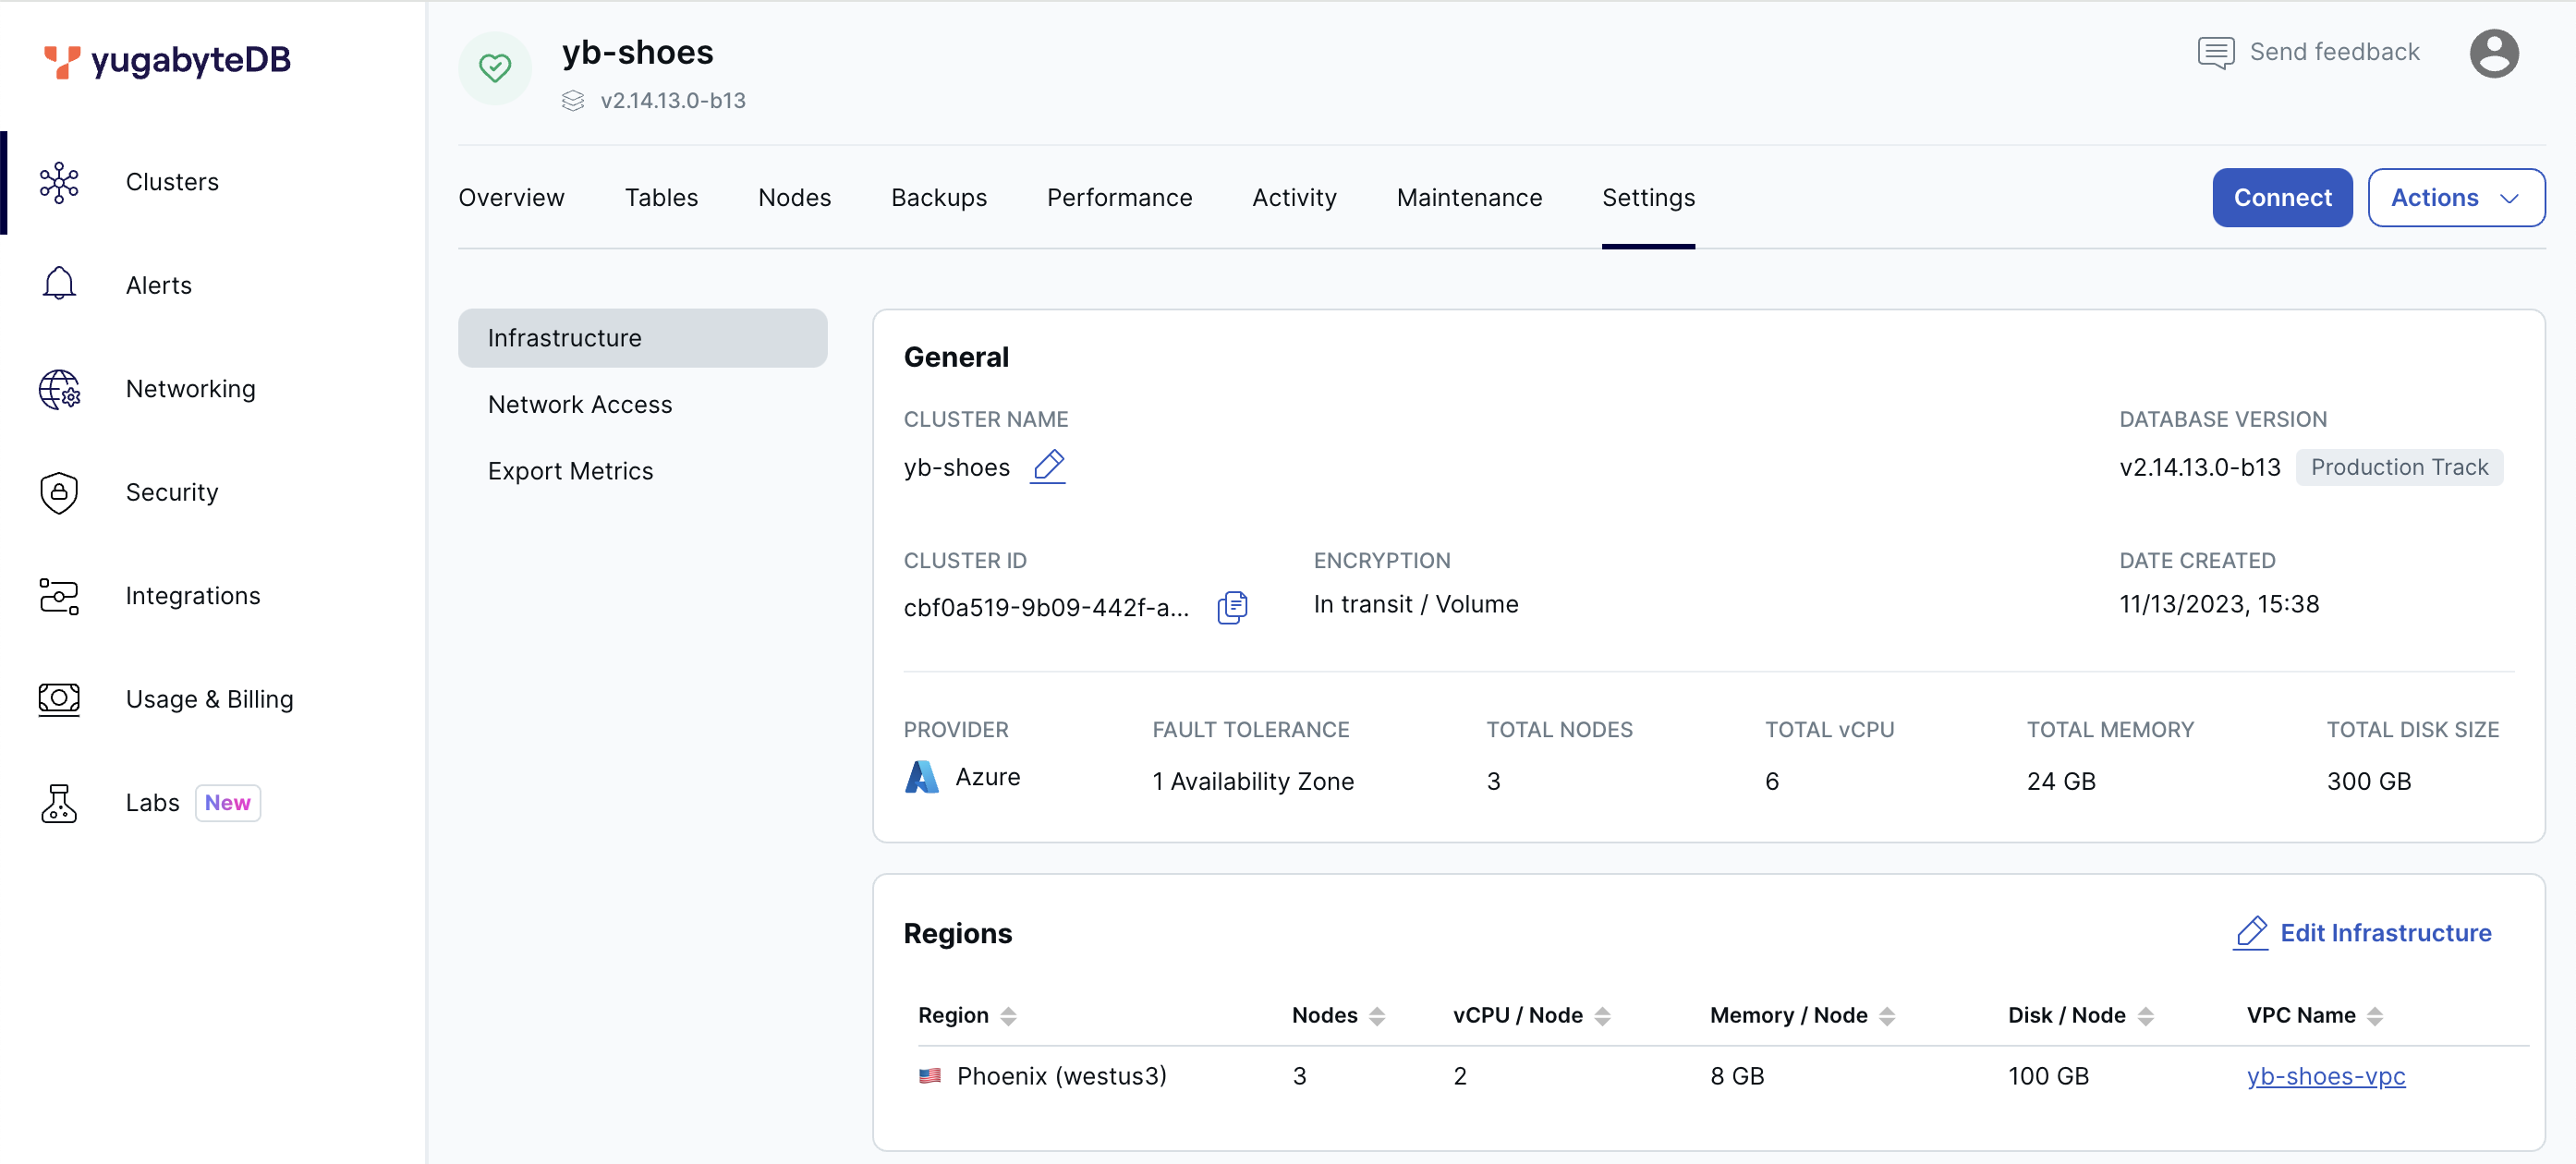
Create a 3-node cluster on Azure in the uswest3 region.

Remember to save the credentials after creation and download the CA certificate once operational, ensuring a secure connection through the Node.js Smart Client.
Get started with Azure
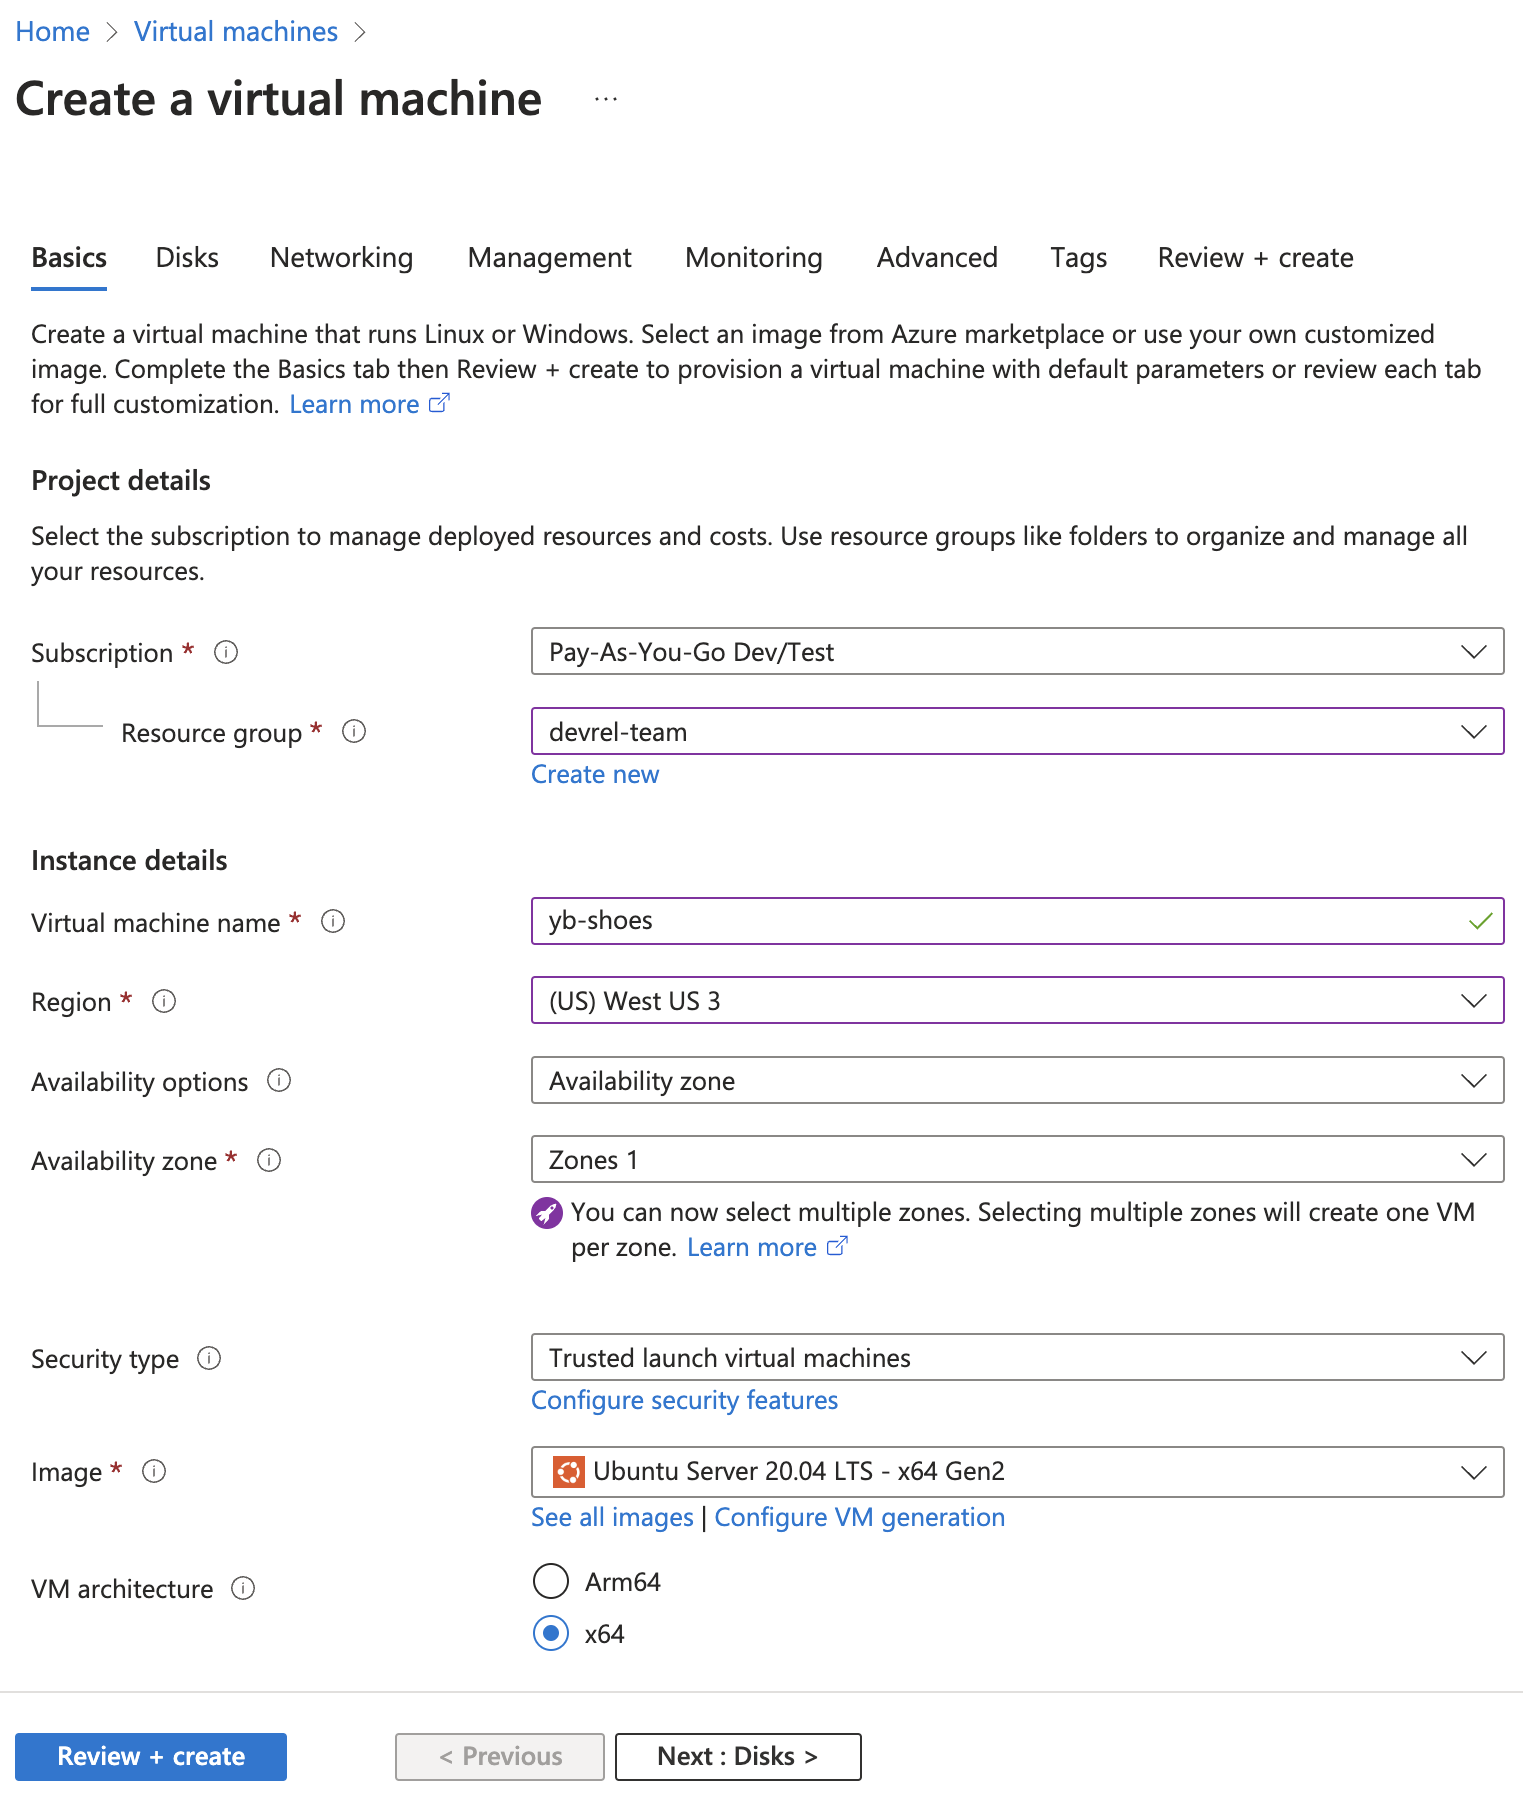
To test the connection between Azure and YugabyteDB using Azure Private Link, start by creating a virtual machine in the Azure console.
-
Create a virtual machine running Ubuntu in Azure. This machine will run the Node.js process that connects to YugabyteDB Aeon.

-
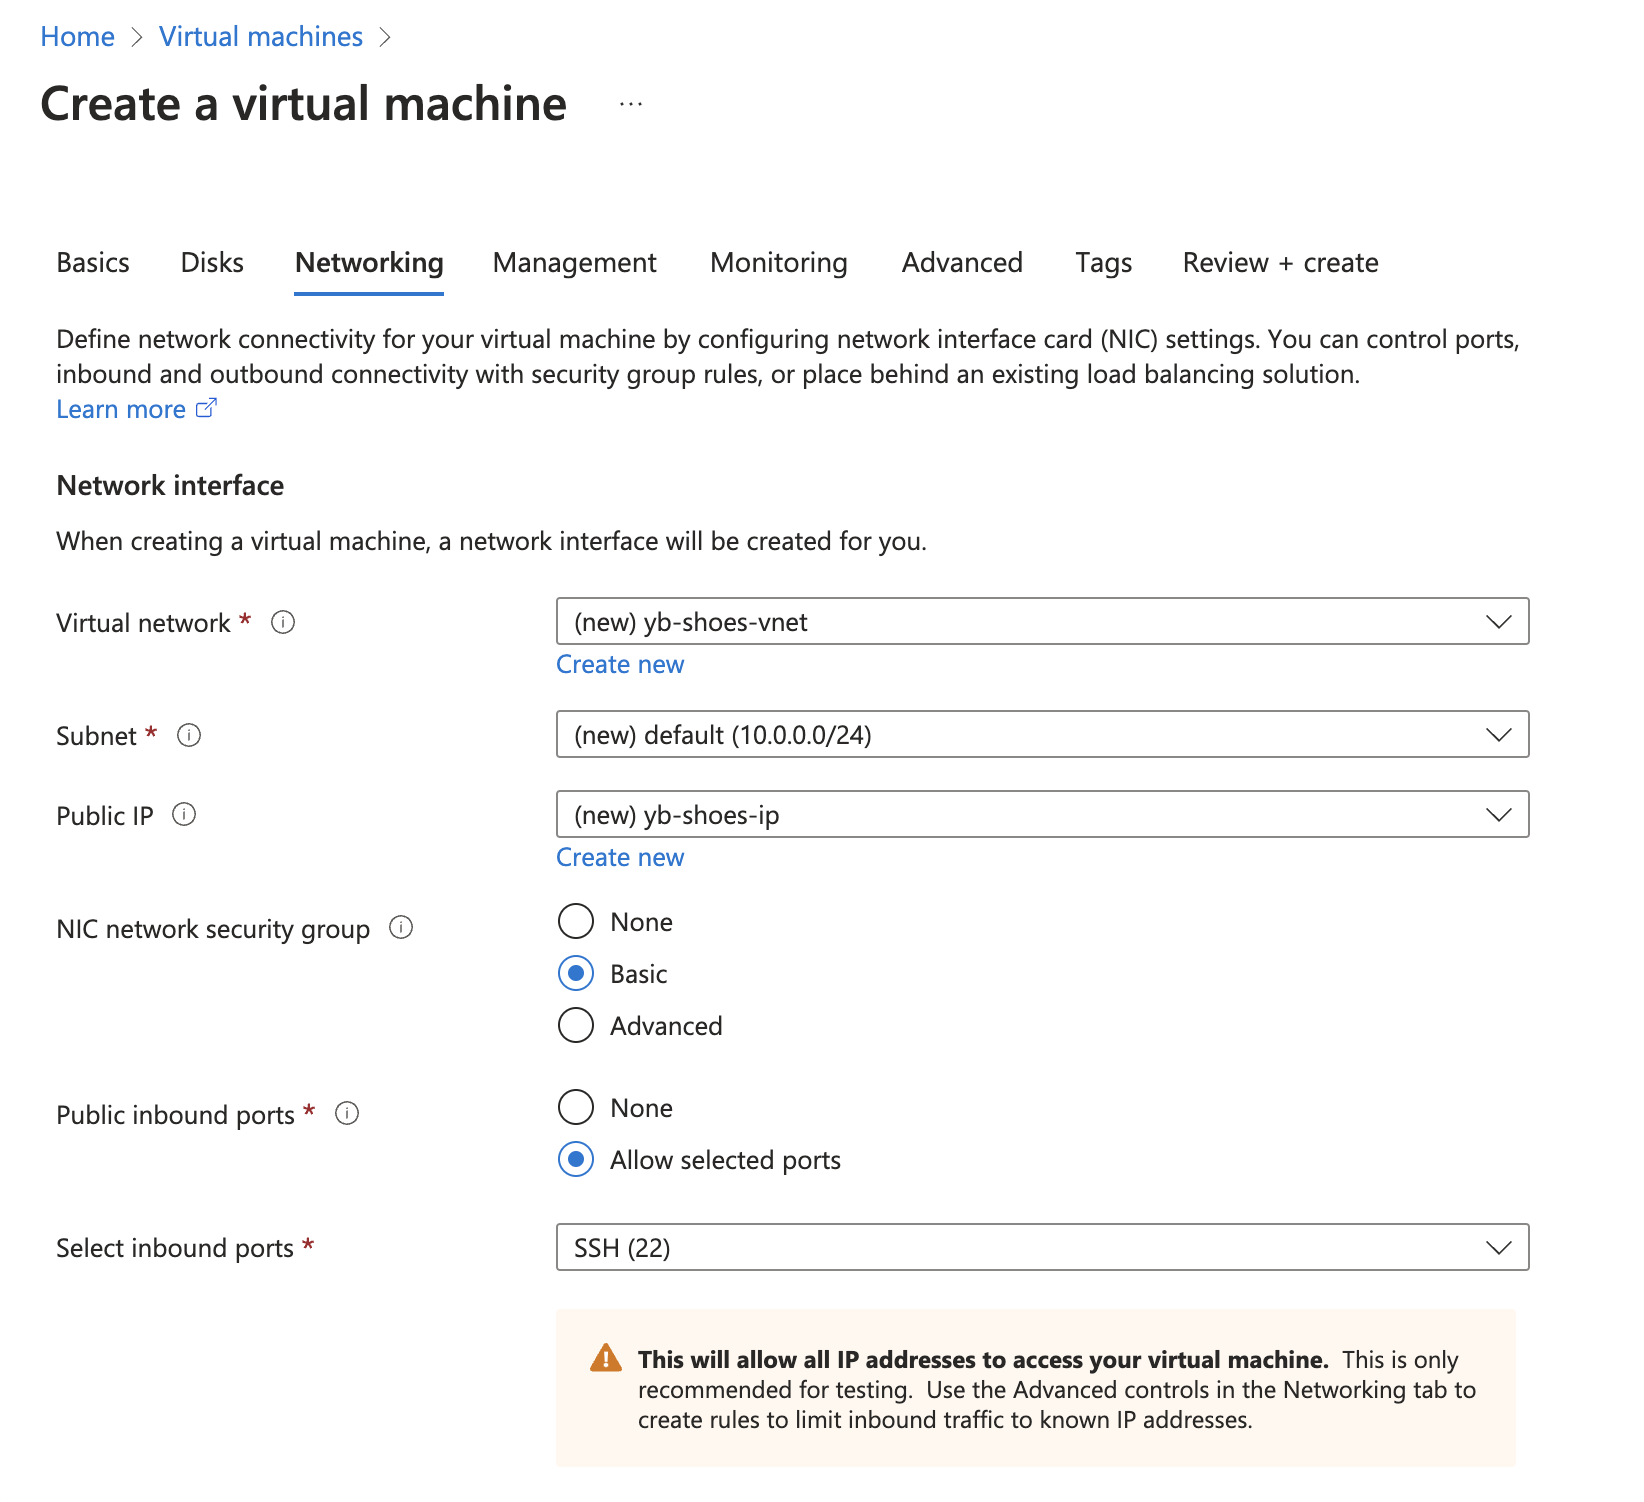
Configure the networking settings on this VM, placing it in a Virtual Network (VNet). If there is no existing VNet in the region selected (in this case, West US 3), a new one will be created by default.

-
Enable a basic Network Security Group to limit the inbound and outbound traffic to the VM.
-
Enable SSH access to securely install system and application dependencies, and copy files to the VM.
Set up Azure Private Link
Follow these instructions to configure Azure Private Link between your YugabyteDB cluster and application VPC.
Once completed, you'll have a Private Service Endpoint which can be used to host our database connection.
Run a Node.js application on Azure
This basic application can be run inside your Azure VNet to verify the connectivity between your application services and the database cluster.
-
Clone the application on GitHub.
-
Edit the database connection details in the .env file and copy the YugabyteDB CA certificate to the root directory of the project.
-
SSH into the virtual machine from the terminal.
ssh -i /path/to/vm/private/key.pem azureuser@[PUBLIC_IP_ADDRESS] -
Prepare the Node.js runtime environment in the VM.
sudo apt update curl https://raw.githubusercontent.com/creationix/nvm/master/install.sh | bash source ~/.bashrc nvm install 18 -
In another terminal window, securely copy the application files to the VM.
scp -r /path/to/YBAzureNetworking/ azureuser@[PUBLIC_IP_ADDRESS]:/home/azureuser -
Install the application dependencies on the VM.
npm install -
Run the application to verify the database connection.
npm run startEstablishing connection with YugabyteDB Aeon... Connected successfully.
Wrap-up
Azure Private Link simplifies establishing a secure connection between Azure-based applications and YugabyteDB.
If you're interested in developing other applications on Azure, check out Build Applications Using Azure App Service.
If you would like to explore the different deployment options of YugabyteDB (including self-managed, co-managed, fully managed, and open source), explore our database comparison page.