Create a single-region cluster
Single-region dedicated clusters support multi-node and highly available deployments and are suitable for production deployments.
Features
Single-region dedicated clusters include the following features:
- Multi-node clusters with availability zone- and node-level fault tolerance.
- No limit on cluster size - choose any cluster size based on your use case.
- Horizontal and vertical scaling - add or remove nodes and vCPUs, and add storage to suit your production loads.
- VPC networking support.
- Automated and on-demand backups.
- Available in all regions.
- Enterprise support.
Prerequisites
- If you want to use dedicated VPCs for network isolation and security, create the VPC before you create your cluster. YugabyteDB Aeon supports AWC and GCP for peering, and AWC and Azure for private linking. Single-region clusters on Azure must be deployed in a VPC. Refer to VPC network.
Create a single-region cluster
To create a single-region cluster, on the Clusters page, click Add Cluster, and choose Dedicated to start the Create Cluster wizard.
The Create Cluster wizard has the following pages:
General and Database Settings

Set the following options:
- Cluster Name: Enter a name for the cluster.
- Provider: Choose a cloud provider.
- Security Profile: Choose Advanced to configure your cluster with added security features. Advanced security requires that the cluster be deployed in a VPC and has scheduled backups, and does not allow public access.
- Database Version: Dedicated clusters are deployed using a stable release. If you have arranged a custom build with Yugabyte, it is also listed here.
- Enhanced Postgres Compatibility: Select this option to enable Enhanced PostgreSQL Compatibility Mode (database v2024.1.0 or later only).
Cluster Setup
Select Single-Region Deployment and set the following options.
Select a fault tolerance for your cluster

Fault tolerance determines how resilient the cluster is to node and zone outages (planned or unplanned). Choose one of the following:
| Fault tolerance | Description | Scaling |
|---|---|---|
| Zone | Resilient to a single zone outage. Minimum of 3 nodes spread across 3 availability zones. This configuration provides the maximum protection for a data center outage. Recommended for production deployments. | Nodes are scaled in increments of 3 (each zone has the same number of nodes). |
| Node | Resilient to 1, 2, or 3 node outages, with a minimum of 3, 5, or 7 nodes respectively, deployed in a single availability zone. Not resilient to zone outages. | Nodes are scaled in increments of 1. |
| None | Minimum of 1 node, with no replication or resiliency. Operations requiring a restart result in downtime (no rolling restart is possible). Recommended for development and testing only. | Nodes are scaled in increments of 1. |
You can't change the Fault tolerance of a cluster after it's created.
Choose a region and size your cluster

Region: Choose the region where the cluster will be located.
Nodes: Enter the number of nodes for the cluster. Node and Availability Zone Level clusters have a minimum of 3 nodes; Availability Zone Level clusters increment by 3.
vCPU/Node: Enter the number of virtual CPUs per node.
Disk size/Node: Enter the disk size per node in GB.
Disk IOPS/Node (AWS only): Enter the disk input output (I/O) operations per second (IOPS) per node. The node throughput will be scaled according to this IOPS value. For large datasets or clusters with high concurrent transactions, higher IOPS is recommended. As disk IOPS is capped by vCPU, your vCPU and IOPS should be scaled together. Reference your current read and write IOPS performance for an estimation.
Dedicated clusters support both horizontal and vertical scaling; you can change the cluster configuration after the cluster is created. Refer to Scale and configure clusters.
Monthly costs for the cluster are estimated automatically.
Configure VPC

To use a VPC for network isolation and security, choose Select a VPC to use a dedicated network isolated from others, then select the VPC. Only VPCs using the selected cloud provider are listed. The VPC must be created before deploying the cluster. Refer to VPC networking.
Network Access
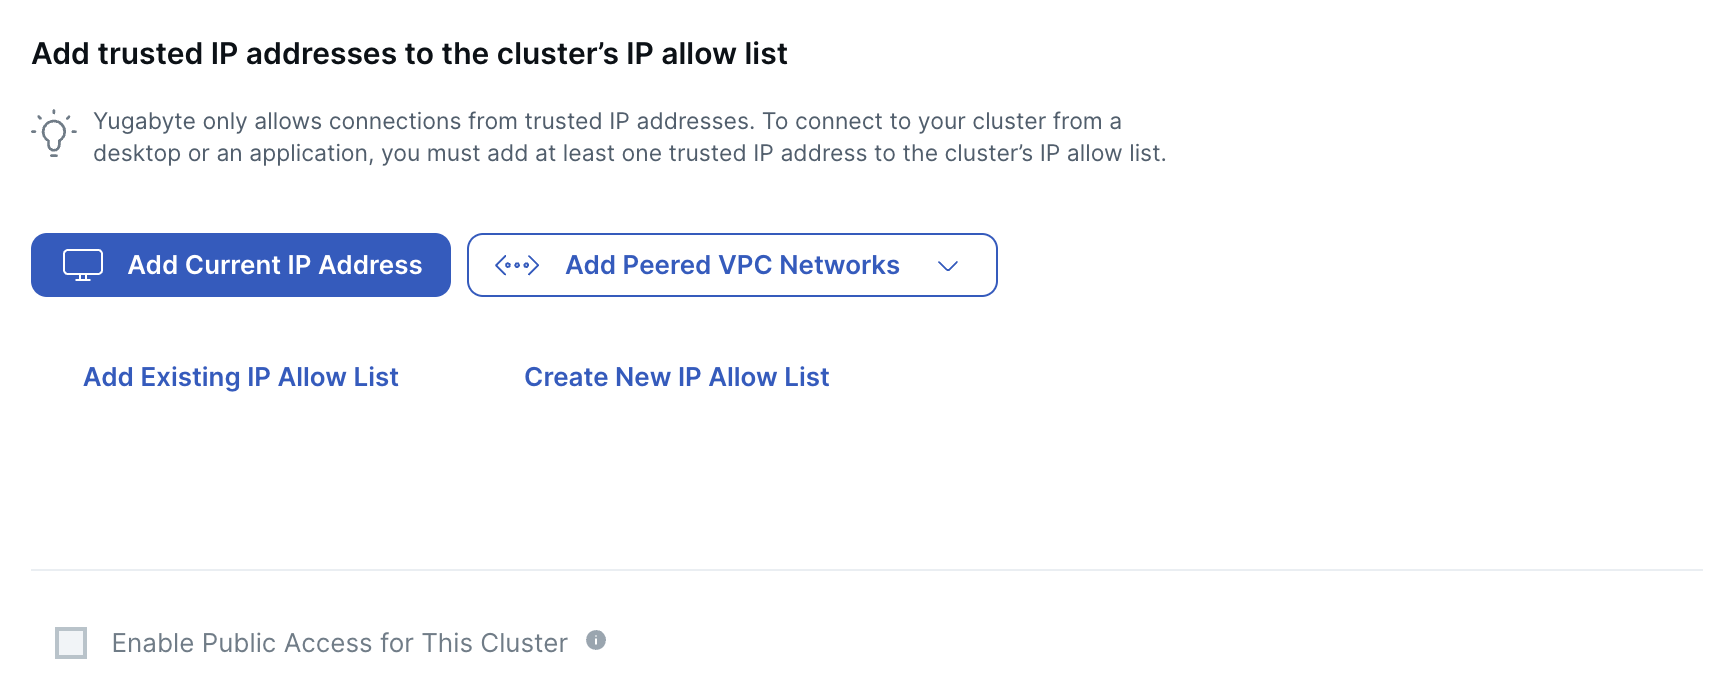
Trusted IP Addresses
YugabyteDB Aeon only allows access to clusters from trusted IP addresses. For applications in peered VPCs to be able to connect, you need to add the CIDR of the peered VPC to the cluster IP allow list. You can also assign IP allow lists to your cluster any time after the cluster is created.

You can add IP addresses using any combination of the following options.
| Option | Description |
|---|---|
| Add Current IP Address | Creates an allow list using the public IP address of your computer and adds it to the cluster IP allow list. |
| Add Peered VPC Networks | Only available for clusters being deployed in a VPC. VPCs must be peered, and the peering connection active for the peered networks to be added to the IP allow list. Choose Add All Peered Networks to create an IP allow list from every network peered with the cluster VPC, and add it to the cluster. Choose Add Individual Peered Networks to select specific peered networks to add to the cluster IP allow list. |
| Add Existing IP Allow List | Choose from a list of IP allow lists already created for your account. |
| Create New IP Allow List | Create a new IP allow list and manually enter the CIDR and public IP addresses. |
Enable Public Access for this Cluster - To connect to a cluster deployed in a VPC from a public IP address (including your current address), you must enable Public Access for the cluster. When enabled, a public IP address is added to each region of the cluster. You can view the private and public host addresses under Connection Parameters on the cluster Settings > Infrastructure tab.
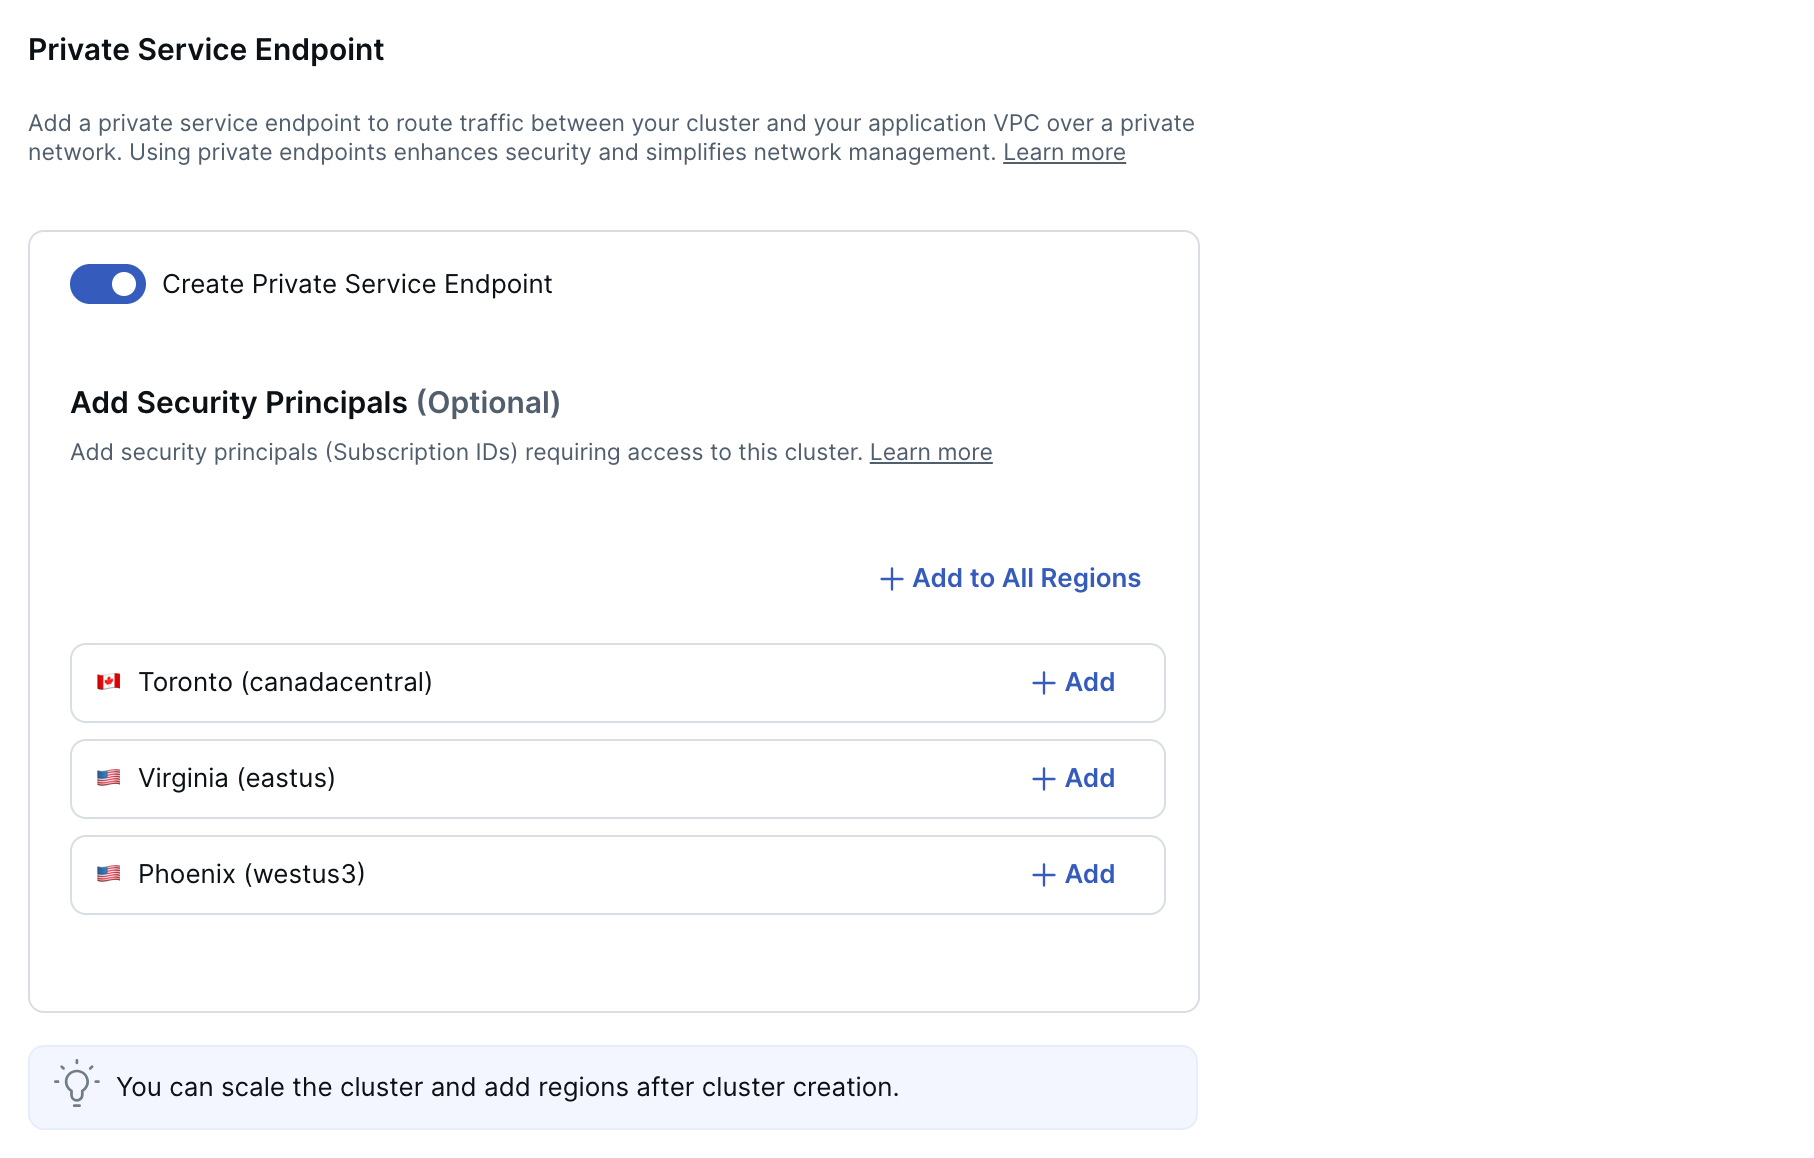
Private Service Endpoint
For clusters in AWS and Azure, you can connect your cluster to your application VPC using a private link. To do this, you add a private service endpoint (PSE) to each region in your cluster.
You can also add PSEs after your cluster is created.

To use a private link for network isolation and security, choose Create Private Service Endpoint, then add security principals. A security principal is a cloud provider account with permissions to manage endpoints. In AWS, this would be Amazon resource names, and in Azure, Subscription IDs.
After the cluster is created, you still need to complete the private link setup by adding an endpoint on your application VPC for each region in your cluster, and linking them to the PSEs on your cluster.
For more information, refer to Private service endpoints.
Security
In addition to the volume encryption that YugabyteDB Aeon uses to encrypt your data, you can enable YugabyteDB encryption at rest (EAR) for clusters. When enabled, your YugabyteDB cluster (including backups) is encrypted using a customer managed key (CMK) residing in a cloud provider Key Management Service (KMS).
To use a CMK to encrypt your cluster, make sure you have configured the CMK in AWS KMS, Azure Key Vault, or Google Cloud KMS. Refer to Prerequisites.

To use a CMK, select the Enable cluster encryption at rest option and set the following options:
-
KMS provider: AWS, Azure, or GCP.
-
For AWS:
- Customer managed key (CMK): Enter the Amazon Resource Name (ARN) of the CMK to use to encrypt the cluster.
- Access key: Provide an access key of an IAM identity with permissions for the CMK. An access key consists of an access key ID and the secret access key.
-
For Azure:
- The Azure tenant ID, the vault URI (for example,
https://myvault.vault.azure.net), and the name of the key. - The client ID and secret for an application with permission to encrypt and decrypt using the CMK.
- The Azure tenant ID, the vault URI (for example,
-
For GCP:
- Resource ID: Enter the resource ID of the key ring where the CMK is stored.
- Service Account Credentials: Click Add Key to select the credentials JSON file you downloaded when creating credentials for the service account that has permissions to encrypt and decrypt using the CMK.
Database Credentials
The database admin credentials are required to connect to the YugabyteDB database that is installed on the cluster.
You can use the default credentials generated by YugabyteDB Aeon, or add your own.
For security reasons, the database admin user does not have YSQL superuser privileges, but does have sufficient privileges for most tasks. For more information on database roles and privileges in YugabyteDB Aeon, refer to Database authorization in YugabyteDB Aeon clusters.
After the cluster is provisioned, you can add more users and change your password.

Download the credentials, and click Create Cluster.
Important
Save your database credentials. If you lose them, you won't be able to use the database.After you complete the wizard, the Clusters page appears, showing the provisioning of your new cluster in progress.
When the cluster is ready, the cluster Overview tab is displayed.
You now have a fully configured YugabyteDB cluster provisioned in YugabyteDB Aeon with the database admin credentials you specified.