Create Kubernetes provider configuration
Before you can deploy universes to OpenShift using YugabyteDB Anywhere, you must create a provider configuration.
Prerequisites
Before creating an OpenShift provider, create a service account with the required roles, and a kubeconfig file.
Create RBAC
Set the YBA_NAMESPACE environment variable to the project where YugabyteDB Anywhere is installed, as follows:
export YBA_NAMESPACE="yb-platform"
Note that the YBA_NAMESPACE variable is used in the commands throughout this document.
To create a service account in the yb-platform project, execute the following command:
export YBA_NAMESPACE="yb-platform"

oc apply \
  -n ${YBA_NAMESPACE} \
  -f https://raw.githubusercontent.com/yugabyte/charts/master/rbac/yugabyte-platform-universe-management-sa.yaml
Expect the following output:
serviceaccount/yugabyte-platform-universe-management created
Next, grant access to this service account using Roles and RoleBindings, so that it can manage universe resources for you. If you are creating clusters across multiple namespaces, you need to create Roles and RoleBindings in each namespace where you intend to create and deploy the universe. Alternatively, you can create ClusterRoles and ClusterRoleBindings, which will allow you to create universes in all the namespaces. For more information, see Platform Global and Platform Namespaced sections from the RBAC resources documentation.
To create the required RBAC objects, execute the following command:
export YBA_NAMESPACE="yb-platform"

curl -s https://raw.githubusercontent.com/yugabyte/charts/master/rbac/platform-namespaced.yaml \
 | sed "s/namespace: <SA_NAMESPACE>/namespace: ${YBA_NAMESPACE}/g" \
 | oc apply -n ${YBA_NAMESPACE} -f -
Expect the following output:
role.rbac.authorization.k8s.io/yugabyte-helm-operations created
role.rbac.authorization.k8s.io/yugabyte-management created
rolebinding.rbac.authorization.k8s.io/yugabyte-helm-operations created
rolebinding.rbac.authorization.k8s.io/yugabyte-management created
Create kubeconfig file
Create a kubeconfig file for this service account. The kubeconfig file is used by YugabyteDB Anywhere to create universes in the OpenShift Container Platform (OCP) cluster. The kubeconfig file needs to be generated for each OpenShift cluster if you are doing a multi-cluster setup.
-
Download a helper script for generating a kubeconfig file by executing the following command:
wget https://raw.githubusercontent.com/YugaByte/charts/master/stable/yugabyte/generate_kubeconfig.py -
Generate the
kubeconfigfile by executing the following command:export YBA_NAMESPACE="yb-platform" python generate_kubeconfig.py \ --service_account yugabyte-platform-universe-management \ --namespace ${YBA_NAMESPACE}Expect the following output:
Generated the kubeconfig file: /tmp/yugabyte-platform-universe-management.conf
Create OpenShift provider
Navigate to Integrations > Infrastructure > Red Hat OpenShift to see a list of all currently configured OpenShift providers.
To create an OpenShift provider, click Create Red Hat OpenShift Config.
The steps are the same as those for a regular Kubernetes provider. For more information, refer to Create a provider.
When creating the provider, set the Kubernetes Provider Type to Red Hat OpenShift.
For information on the Kubernetes provider settings, refer to Provider settings.
Troubleshoot OpenShift universes
After creating the provider, you can deploy universes. Refer to Create universes.
If the universe creation remains in Pending state for more than 2-3 minutes, open the OCP web console, navigate to Workloads > Pods and check if any of the pods are in pending state, as shown in the following illustration:
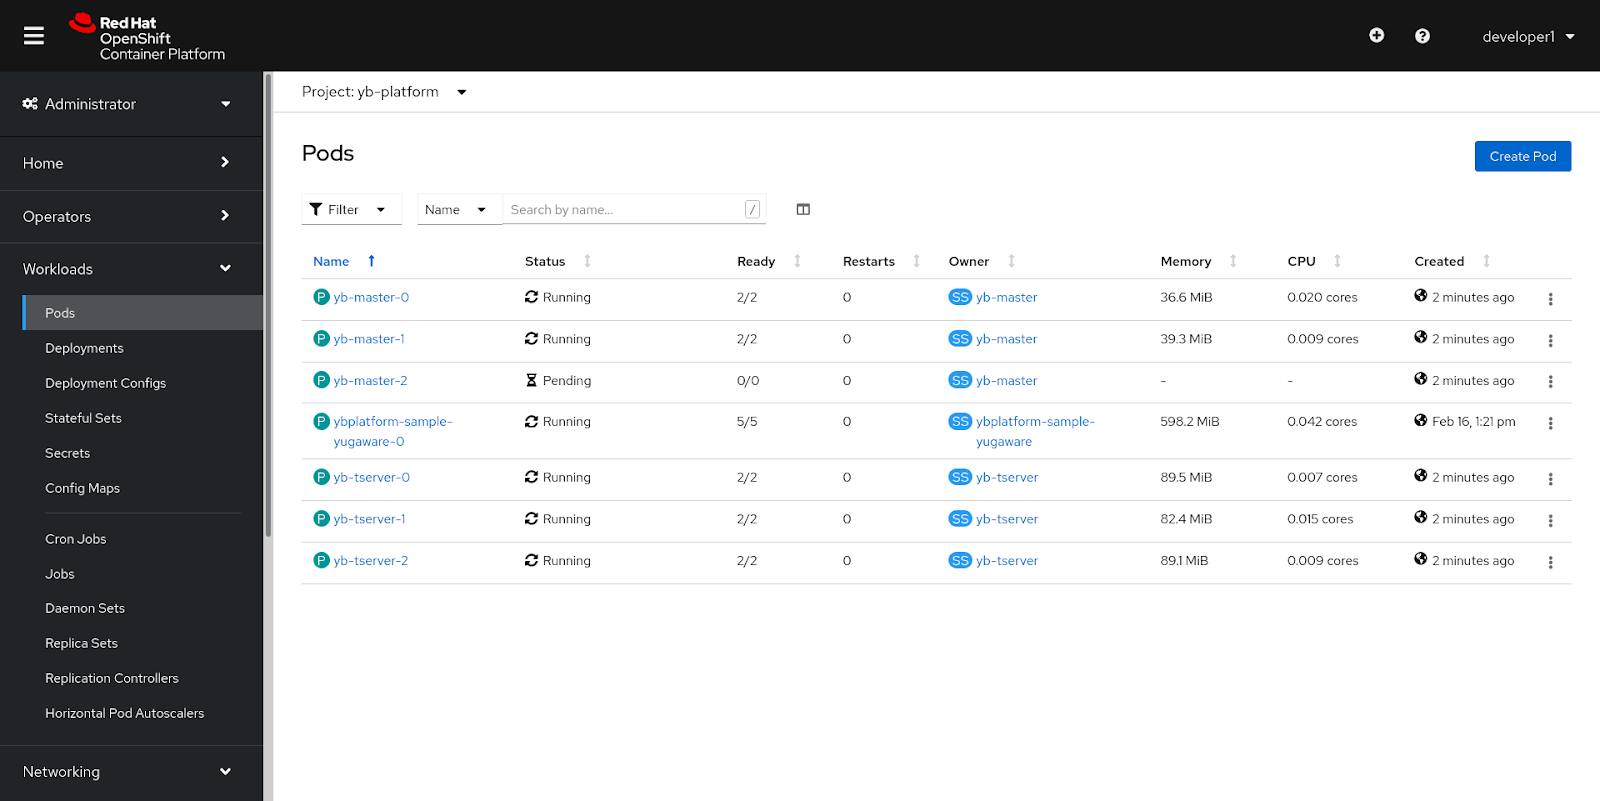
Alternatively, you can execute the following command to check status of the pods:
export YBA_NAMESPACE="yb-platform"

oc get pods -n ${YBA_NAMESPACE} -l chart=yugabyte
Expect an output similar to the following:
# output
NAME          READY STATUS  RESTARTS AGE
yb-master-0   2/2   Running  0     5m58s
yb-master-1   2/2   Running  0     5m58s
yb-master-2   0/2   Pending  0     5m58s
yb-tserver-0  2/2   Running  0     5m58s
yb-tserver-1  2/2   Running  0     5m58s
yb-tserver-2  2/2   Running  0     5m58s
If any of the pods are in pending state, do the following:
-
Log in with an admin account and navigate to Compute > Machine Sets.
-
Open the Machine Set corresponding to your zone label (us-east4-a).
-
Click Desired Count and increase the count by 1 or 2, as shown in the following illustration.
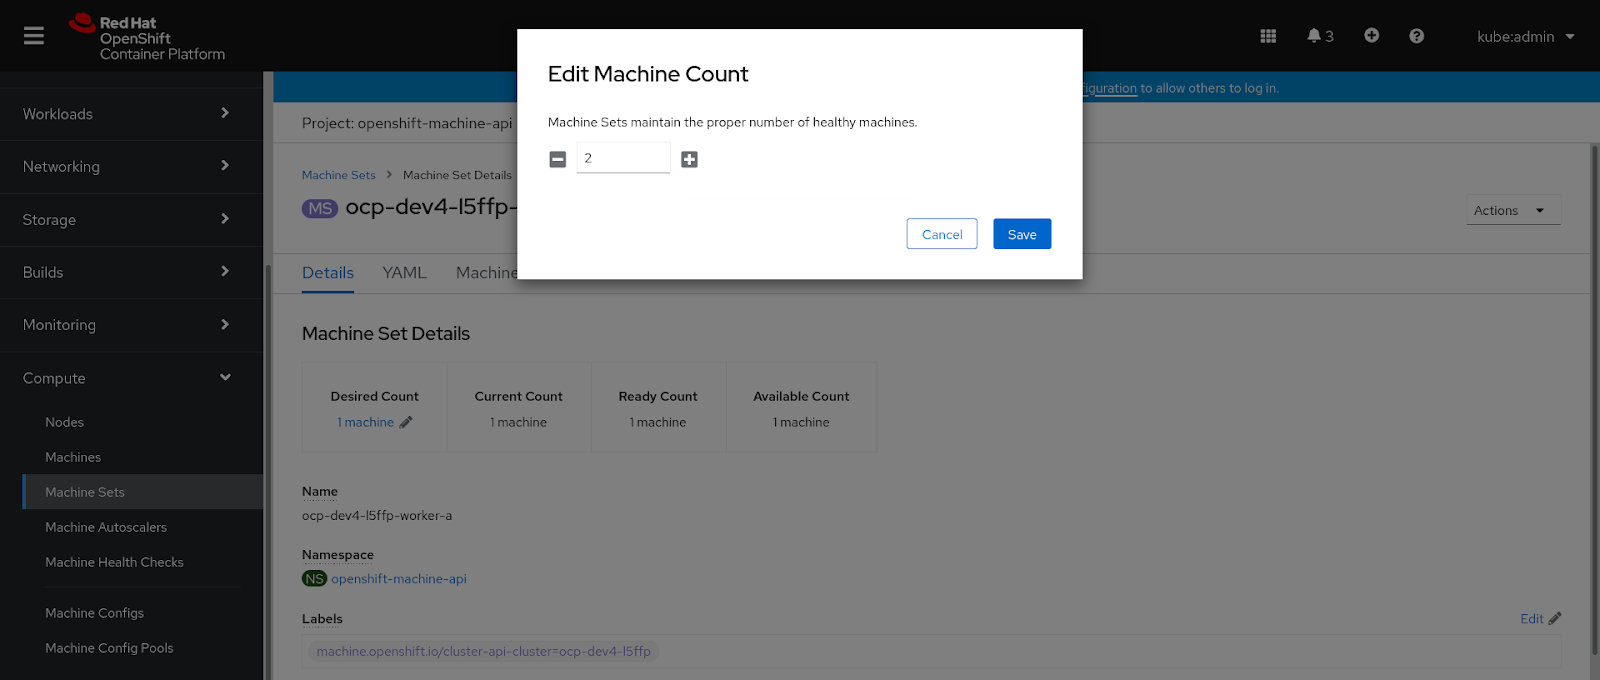
-
Click Save.
Alternatively, you can scale the Machine Sets by executing the following command as admin user:
oc scale machineset ocp-dev4-l5ffp-worker-a --replicas=2 -n openshift-machine-api
Expect the following output:
# output
machineset.machine.openshift.io/ocp-dev4-l5ffp-worker-a scaled
As soon as the new machine is added, the pending pods become ready.