Schedule universe backups
YugabyteDB Anywhere can perform regularly scheduled backups of YugabyteDB universe data for all tables in a database (YSQL) or keyspace (YCQL) or only the specified tables (YCQL only).
To perform scheduled backups, as well as enable Restore to a point in time for backups, you first create a scheduled backup policy.
To back up your universe data immediately, see Back up universe data.
Note: To schedule backups, backups must be enabled for the universe (the default).
Create a scheduled backup policy
Before scheduling a backup of your universe data, create a policy, as follows:
-
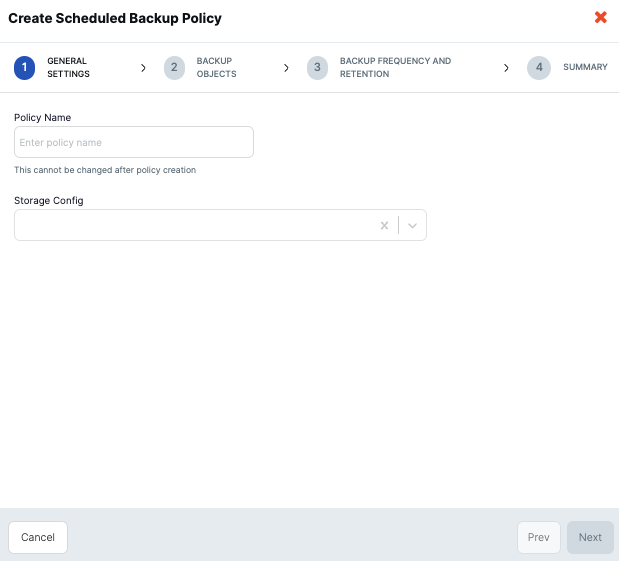
Navigate to your universe, select Backups > Scheduled Backup Policies, and click Create Scheduled Backup Policy to open the Create Scheduled Backup Policy wizard.
-
Provide a name for the backup policy, and select the storage configuration. For more information, see Configure backup storage. When finished, click Next.
-
Select the Keyspaces/Databases you want to back up, either YSQL or YCQL.
For YSQL, you have an additional Advanced Configuration option to include Backup tablespace information (enabled by default). If you don't choose to back up tablespaces, the tablespaces are not preserved and their data is backed up to the primary region.
For YCQL, you can choose to back up all tables or a selection of tables. Click Select a subset of tables to display the Select Tables dialog, where you can select one or more tables to back up, and click Confirm.
-
To back up database roles (YSQL only), choose the Backup global roles option.
When finished, click Next.
-
Select a backup strategy:
- Standard backup (without PITR support), or
- Backup with ability to restore to point-in-time
Note that, with point-in-time enabled backups, you cannot restore to a point in time earlier than the most recent DDL change. To restore to a time prior to the DDL change, you need a backup that was performed prior to the change.
Specify the interval between backups or select Use cron expression (UTC).
Enable Take incremental backups within full backup intervals to instruct the schedule policy to take full backups periodically and incremental backups between those full backups. The incremental backup intervals must be shorter than the full scheduled backup frequency.
Specify the time period to retain a backup, or select Keep indefinitely to never delete the backup.
When finished, click Next.
-
Review the backup policy summary to ensure all details are correct, and click Create Scheduled Backup Policy to finalize and create the policy.
You should see an in progress notification indicating the backup creation, and as the process is asynchronous, it may take a few minutes to complete.
After the backup creation process is complete, the policy will be automatically enabled as per the following illustration:

Backups created with PITR support will show Enabled status in the Point-in-Time Restore column of the Backups list. Hover over this status to view the restore window's start and end times as per the following illustration:

Edit a scheduled backup policy
You can change the backup frequency of a scheduled backup policy as follows:
- Navigate to your universe and select Backups > Scheduled Backup Policies.
- For your scheduled backup, click Actions > Edit Policy.
- Change the interval between backups or select Use cron expression (UTC).
- Click Save.
Disable scheduled backups
You can disable scheduled backups as follows:
- Navigate to your universe and select Backups > Scheduled Backup Policies.
- Disable the policy managing the backup you want to disable.
Delete backups and policies
You can permanently remove a scheduled backup, as follows:
- Navigate to your universe and select Backups > Backups.
- Find the scheduled backup in the Backups list and click ... > Delete Backup.
To delete a policy, select Scheduled Backup Policies, find the policy and click its Actions > Delete Policy.