Automatically generated certificates
YugabyteDB Anywhere can automatically create and manage self-signed certificates for universes when you create them. These certificates may be shared between universes in a single instance of YugabyteDB Anywhere.
Automatically generated certificates are named using the following convention:
yb-environment-universe_name
where environment is the environment type (either dev, stg, demo, or prod) that was used during the tenant registration (admin user creation), and universe_name is the provided universe name.
YugabyteDB Anywhere generates the root CA certificate, root private key, and node-level certificates (assuming node-to-node or client-to-node encryption is enabled), and then provisions those artifacts to the database nodes any time nodes are created or added to the cluster. The following three files are copied to each node:
- The root certificate (
ca.cert). - The node certificate (
node.ip_address.crt). - The node private key (
node.ip_address.key).
YugabyteDB Anywhere retains the root certificate and the root private key for all interactions with the cluster.
To view the certificate details, navigate to Integrations > Security > Encryption in Transit and click Show details.
Note that automatically generated certificates must be manually rotated.
Customize the organization name in self-signed certificates
YugabyteDB Anywhere automatically creates self-signed certificates when you run some workflows, such as create universe. The organization name in certificates is set to example.com by default.
If you are using YugabyteDB Anywhere version 2.18.2 or later to manage universes with YugabyteDB version 2.18.2 or later, you can set a custom organization name using the global runtime configuration flag, yb.tlsCertificate.organizationName.
Note that, for the change to take effect, you need to set the flag before you run a workflow that generates a self-signed certificate.
Customize the organization name as follows:
-
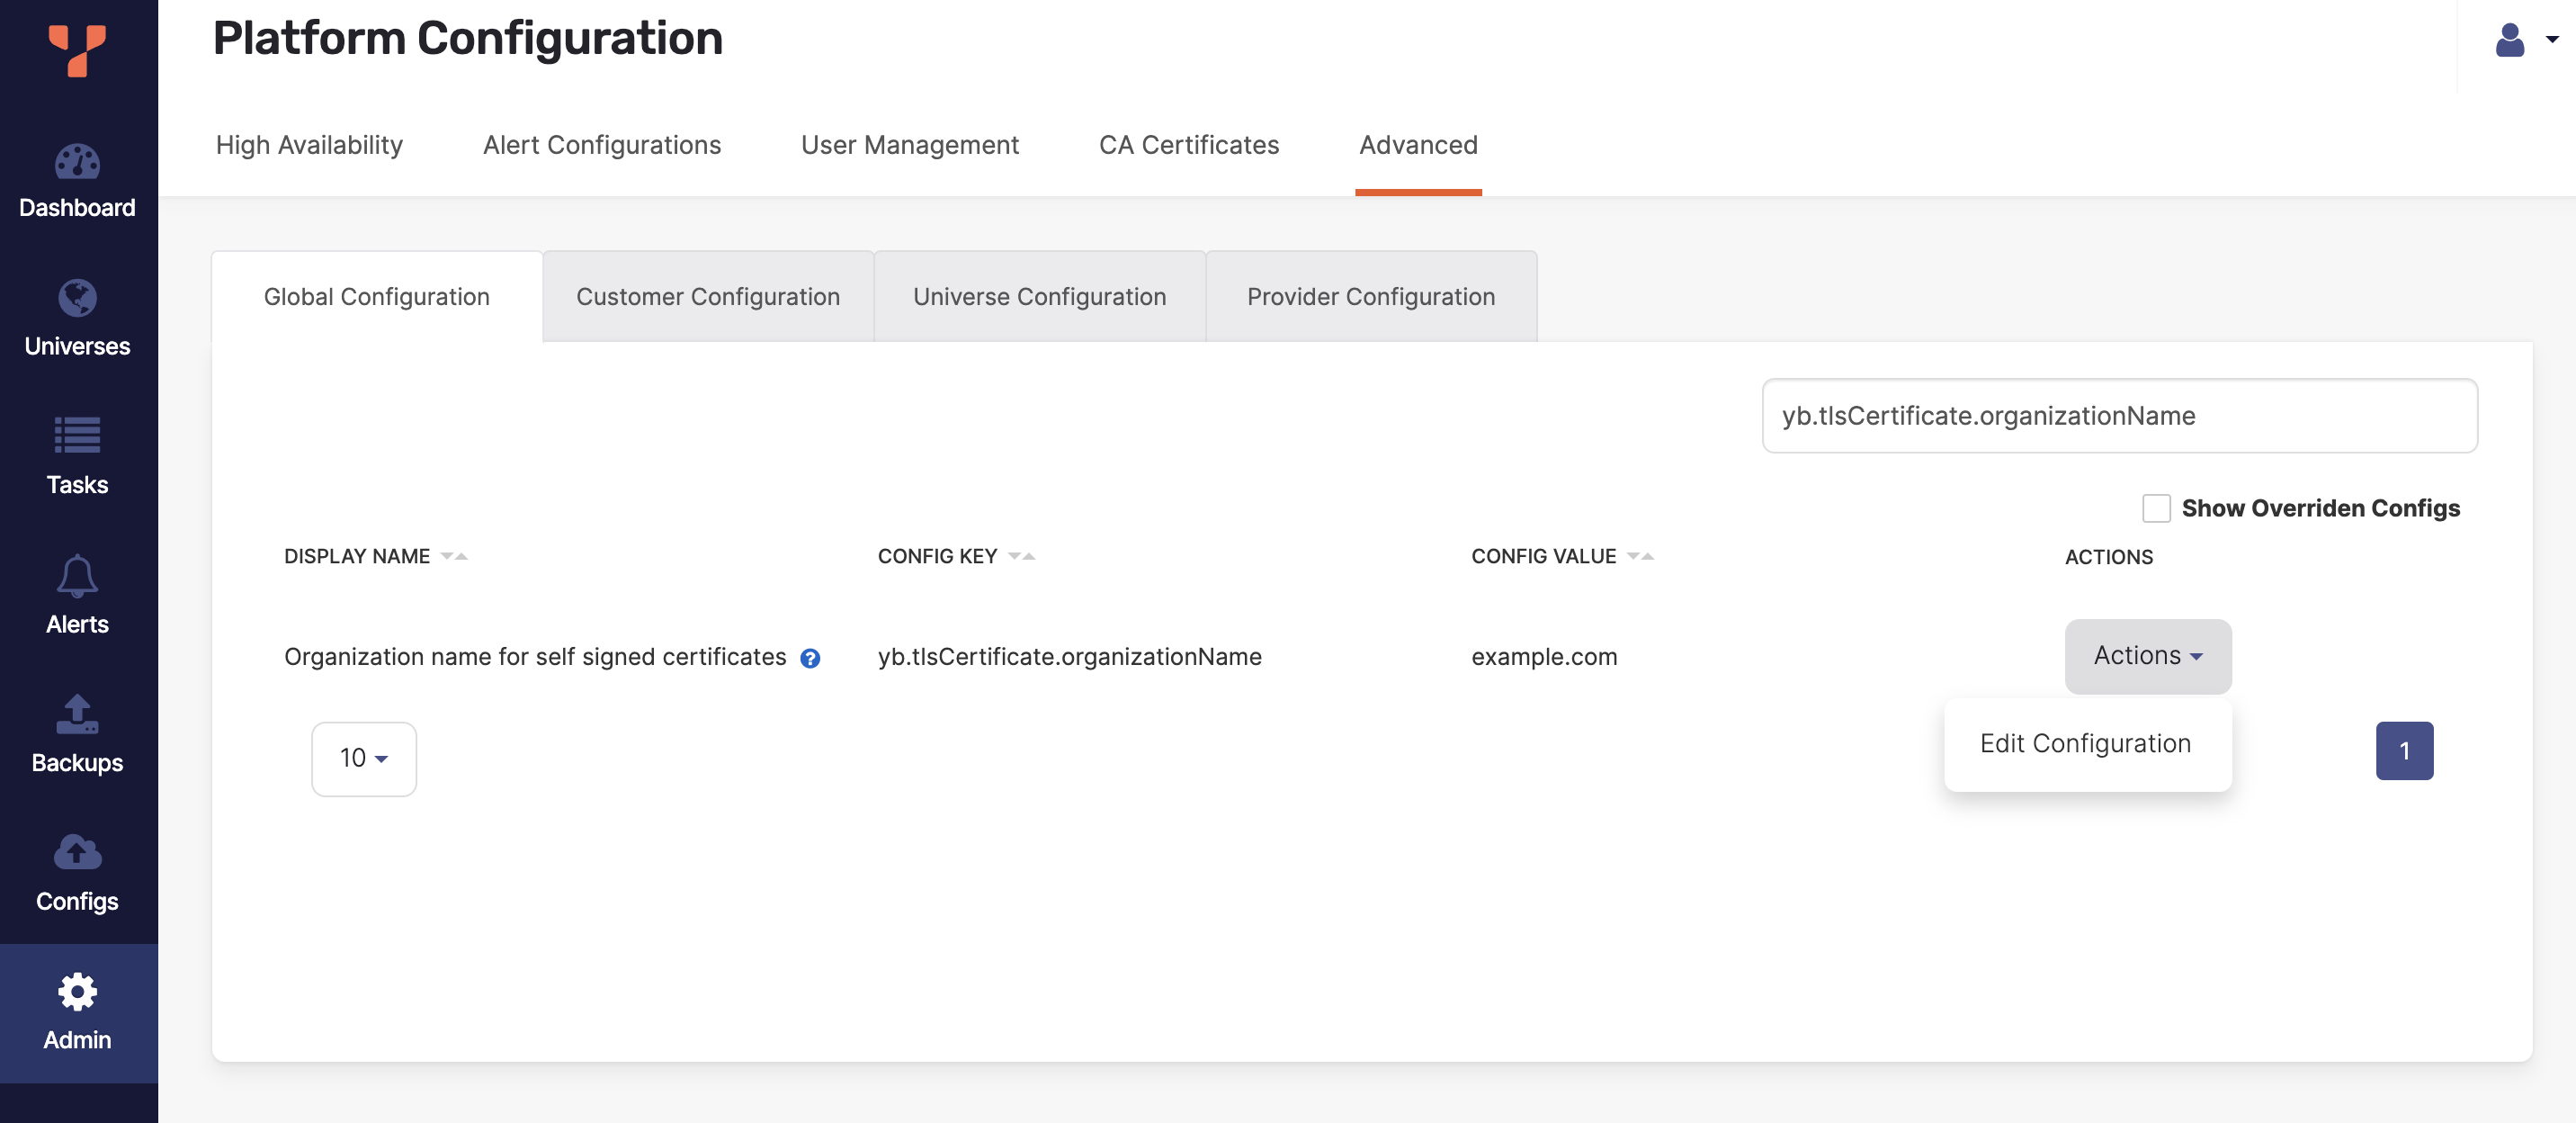
In YugabyteDB Anywhere, navigate to Admin > Advanced and select the Global Configuration tab.
-
In the Search bar, enter
yb.tlsCertificate.organizationNameto view the flag, as per the following illustration:
-
Click Actions > Edit Configuration, enter a new Config Value, and click Save.
Validate custom organization name
You can verify the organization name by running the following openssl x509 command:
openssl x509 -in ca.crt -text
Certificate:
    Data:
        Version: 3 (0x2)
        Serial Number: 1683277970271 (0x187eb2f7b5f)
        Signature Algorithm: sha256WithRSAEncryption
        Issuer: CN=yb-dev-sb-ybdemo-univ1~2, O=example.com
        Validity
            Not Before: May 5 09:12:50 2023 GMT
            Not After : May 5 09:12:50 2027 GMT
Notice that default value is O=example.com.
After setting the runtime configuration to a value of your choice, (org-foo in this example), you should see output similar to the following:
openssl x509 -in ca.crt -text -noout
Certificate:
    Data:
        Version: 3 (0x2)
        Serial Number: 1689376612248 (0x18956b15f98)
        Signature Algorithm: sha256WithRSAEncryption
        Issuer: CN = yb-dev-sb-ybdemo-univ1~2, O = org-foo
        Validity
            Not Before: Jul 14 23:16:52 2023 GMT
            Not After : Jul 14 23:16:52 2027 GMT
        Subject: CN = yb-dev-sb-ybdemo-univ1~2, O = org-foo
        Subject Public Key Info:
            Public Key Algorithm: rsaEncryption
                Public-Key: (2048 bit)
                Modulus: