Multi-cloud migration
Moving applications from an on-premises data center to a public cloud, or from one public cloud to another, is a non-trivial task. YugabyteDB provides a simple pattern for you to accomplish this task with comparative ease.
Migration between two clouds
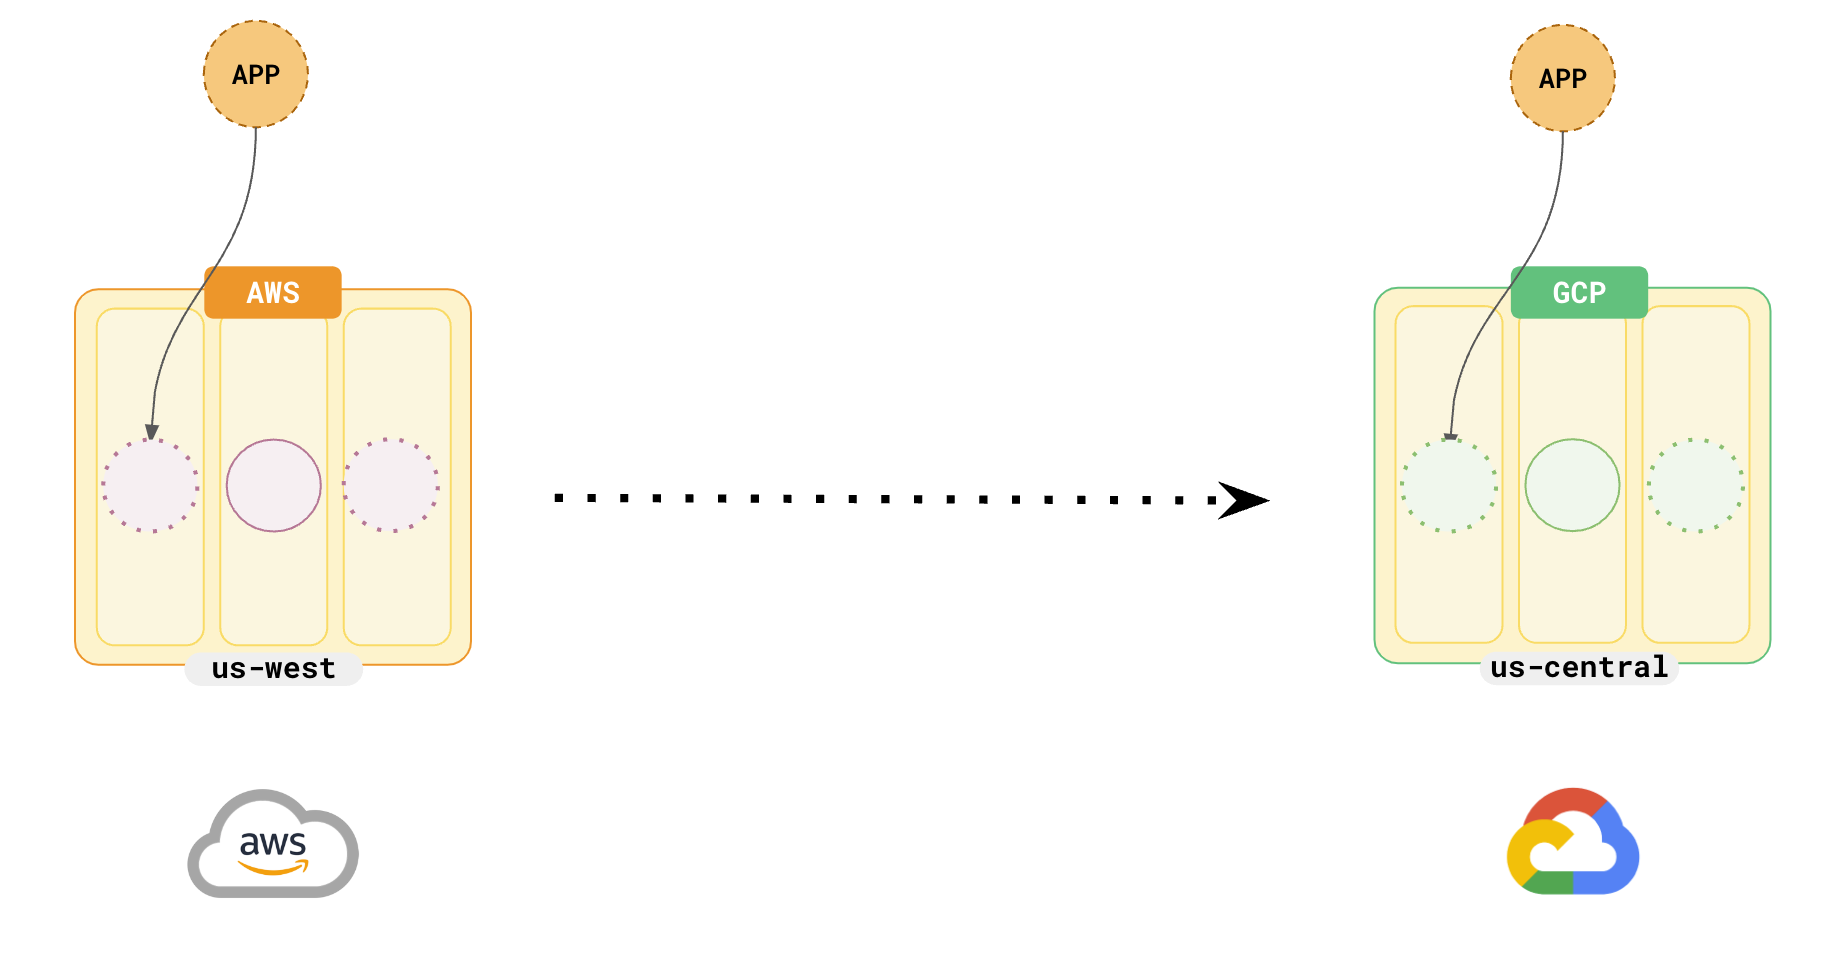
To illustrate, consider a scenario where you have a 3-node cluster deployed in AWS (us-west) and would like to move to GCP (us-central).

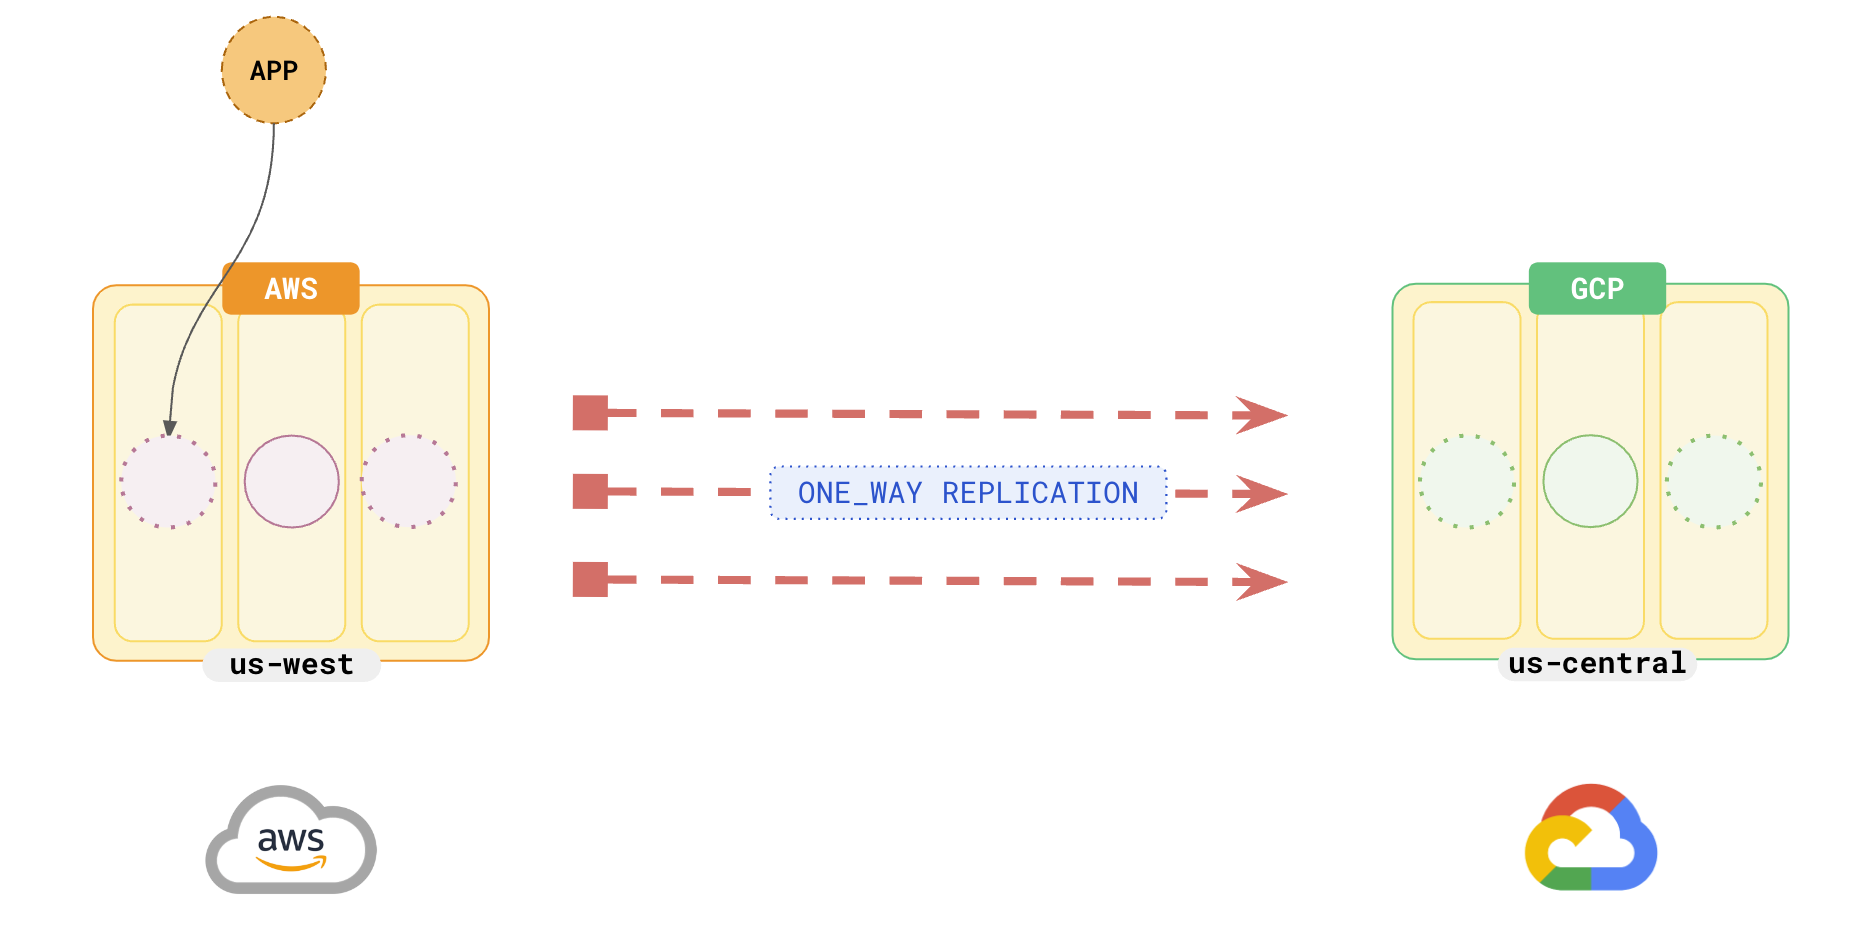
To accomplish the migration, use the xCluster feature, which provides one-way asynchronous replication from one universe to another. In this case, AWS will be the source and the GCP universe will be the target.
Set up the universes
Set up the Source universe in AWS and the Target universe in GCP using the following setup procedures.
When finished, note down the universe-uuids of the source and target universes.
Bootstrap the new universe
After the GCP universe has been set up, you need to populate the data from your AWS universe. This is typically referred to as Bootstrapping.
The basic flow of bootstrapping is as follows:
-
Create a checkpoint for all the tables in the AWS universe. For example:
./bin/yb-admin -master_addresses <AWS_universe_master_addresses> \ bootstrap_cdc_producer <comma_separated_source_universe_table_ids> -
Take a backup of the tables on the AWS universe and restore them to the GCP universe. See Backup and Restore.
This ensures that the current data in your AWS universe is correctly copied over to the GCP universe.
Set up replication
After your data has been pre-populated from the AWS universe to the GCP universe, you need to set up the replication stream from the AWS to the GCP universe.
A simple way to set up replication is as follows:
./bin/yb-admin -master_addresses <GCP_universe_master_addresses> setup_universe_replication \
  <AWS_universe_uuid>_<replication_stream_name> <AWS_universe_master_addresses> \
  <comma_separated_source_universe_table_ids> <comma_separated_bootstrap_ids>

Any data changes to the AWS universe are automatically applied to the GCP universe. Note: For this example, DDL changes have to be applied manually.
Switch over to the new universe
After the new universe has caught up with the data from the old universe, you can switch over to the new universe.
The basic flow of switchover is as follows:
-
Verify that the data has been successfully migrated using basic techniques like validating the number of rows of the corresponding tables in both universes are the same (for example,
SELECT count(*)). -
Stop the application traffic to the old universe to ensure no more data changes are attempted.
-
Pause the replication on the new universe.
-
Promote the GCP universe to
ACTIVE. For example:./bin/yb-admin \ -master_addresses <GCP_master_addresses> \ -certs_dir_name <cert_dir> \ change_xcluster_role ACTIVE
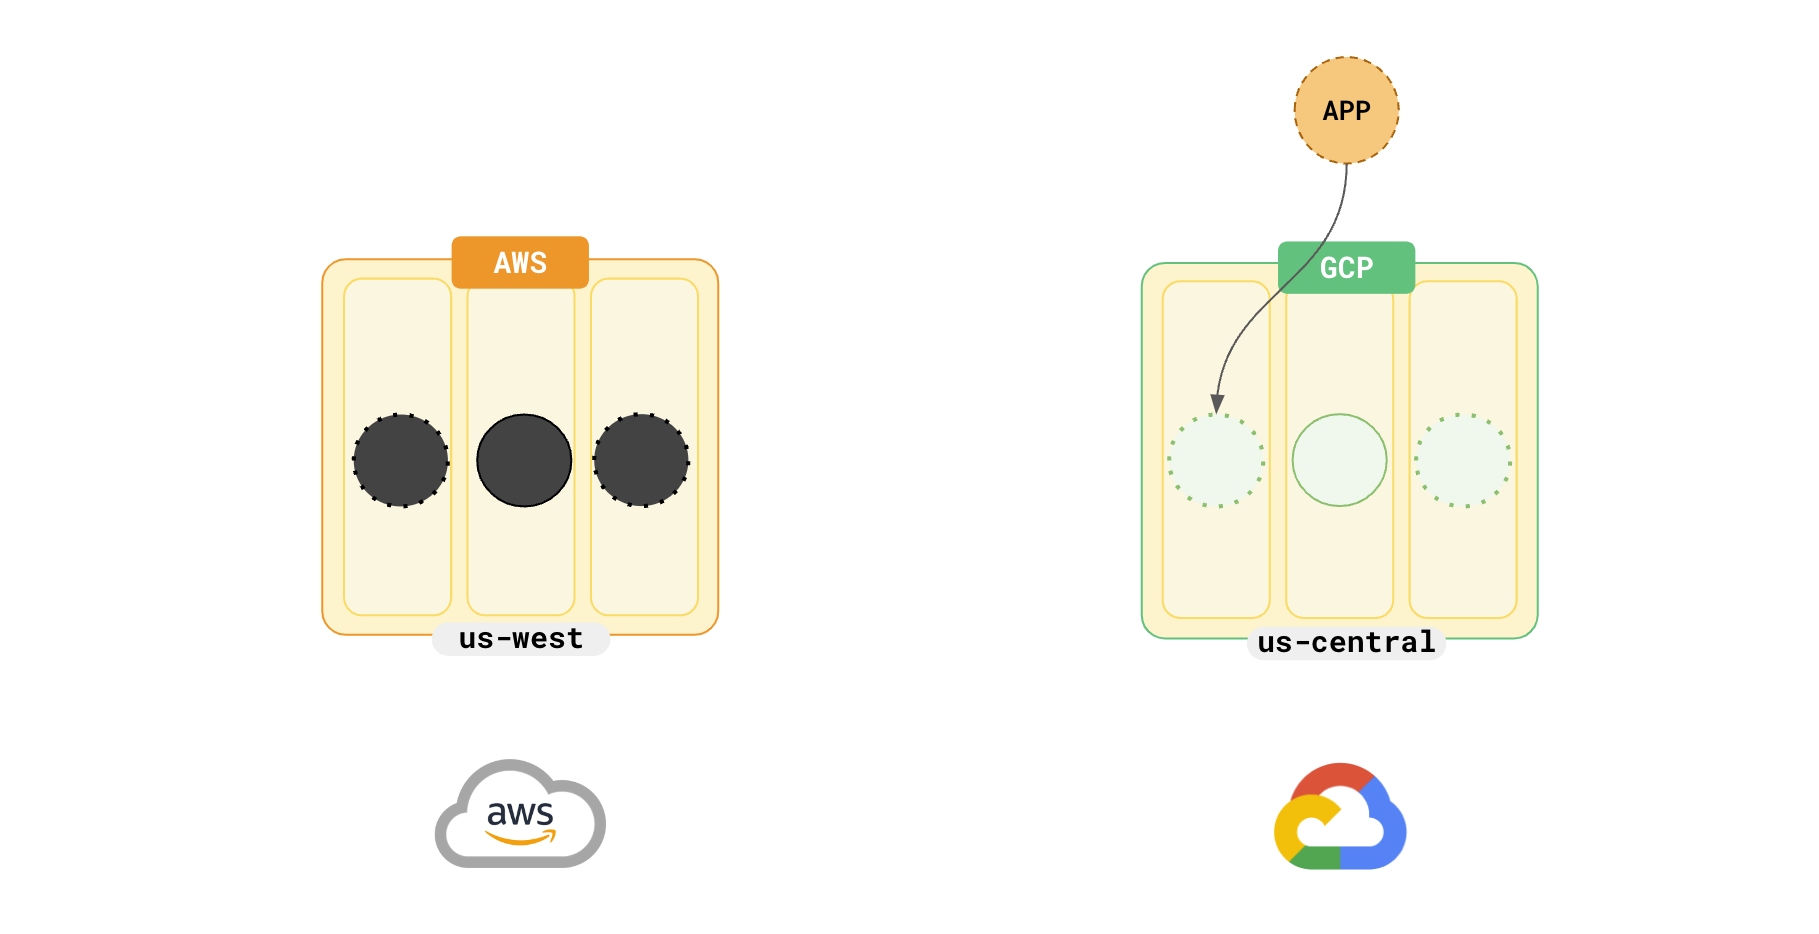
You can point your applications to the new universe in GCP and then stop the replication, as shown in the following illustration.

At this point, you can either tear down your AWS universe or convert it to a stand-by cluster for disaster recovery, by setting up an xCluster replication from the new GCP universe to the AWS universe.
Migration from on-premises data centers
You can use the same procedure to migrate data from your on-premises data centers to the public cloud. Moving from on-premises data centers to a public cloud requires a more cautious approach. You might want to consider a Hybrid cloud before moving completely to a public cloud. Refer to Hybrid Cloud for more details.