Multi-cloud setup
You can create a multi-cloud YugabyteDB universe spanning multiple geographic regions and cloud providers. The following sections describe how to set up a multi-cloud universe using yugabyted or an on-prem provider in YugabyteDB Anywhere.
Topology
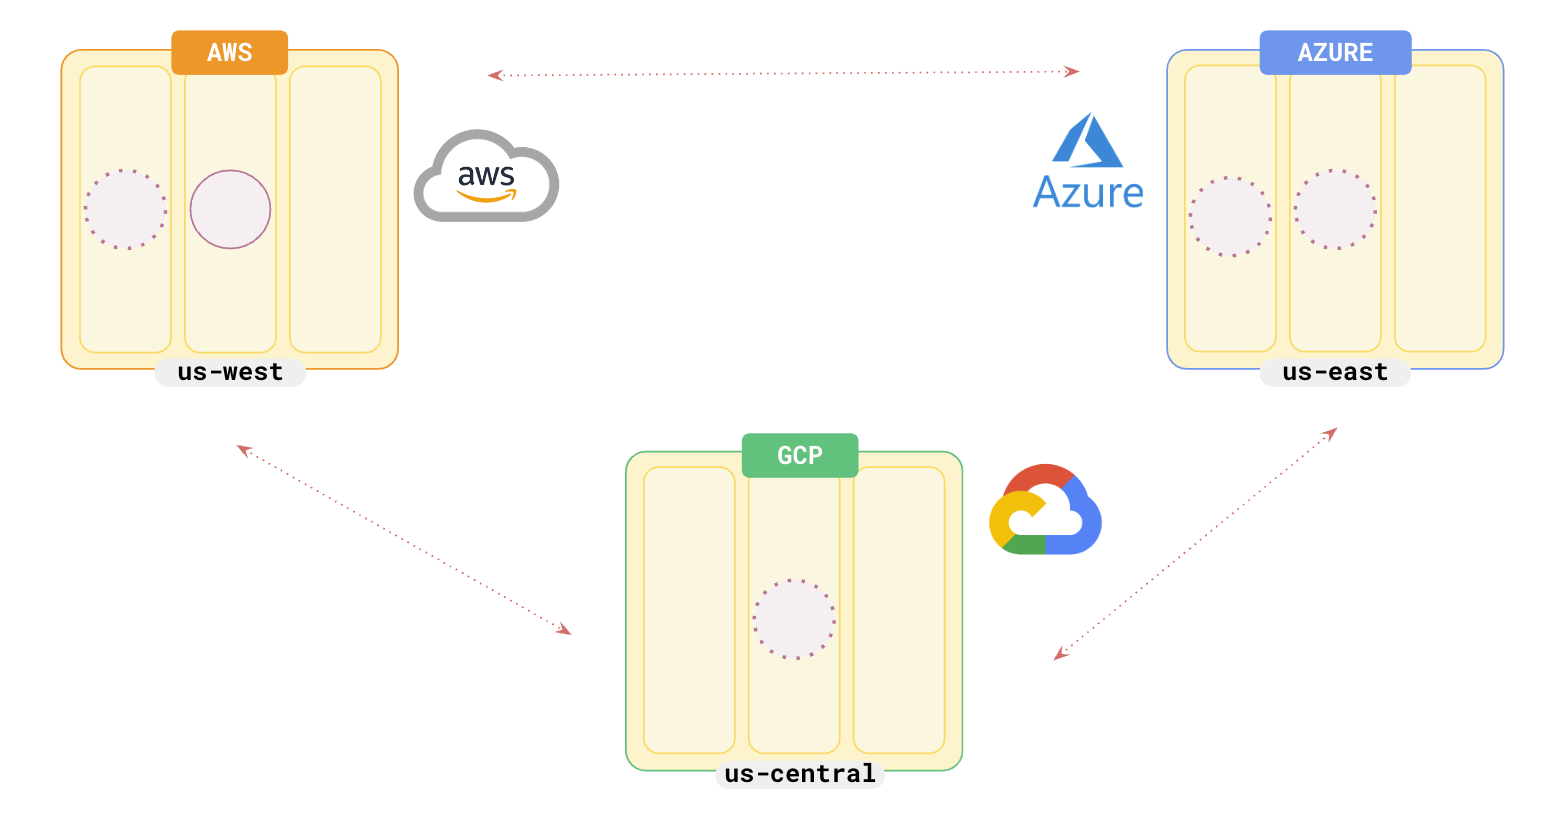
For illustration, you can set up a 6-node universe across AWS (us-west), GCP (us-central), and Azure (us-east), with a replication factor of 5.
Note
To be ready for a any region failure, you should opt for a replication factor of 7.
VPC peering
Although for the current example, you do not have to set up VPC peering, for different clouds to be able to talk to each other, you need to set up multi-cloud VPC peering through a VPN tunnel. See Set up VPC peering for detailed information.Set up the multi-cloud universe
For illustration, set up a 6-node universe with 2 nodes each in AWS, GCP, and Azure.
First cloud - AWS
Set up a local cluster
If a local universe is currently running, first destroy it.
Start a local two-node universe with an RF of 5 by first creating a single node, as follows:
./bin/yugabyted start \
                --advertise_address=127.0.0.1 \
                --base_dir=/tmp/ydb-aws-1 \
                --cloud_location=aws.us-west-2.us-west-2a
On macOS, the additional nodes need loopback addresses configured, as follows:
sudo ifconfig lo0 alias 127.0.0.2
Start the second node as follows:
./bin/yugabyted start \
                --advertise_address=127.0.0.2 \
                --base_dir=/tmp/ydb-aws-2 \
                --cloud_location=aws.us-west-2.us-west-2a \
                --join=127.0.0.1
Second cloud - GCP
Note
These nodes in GCP will join the cluster in AWS (127.0.0.1)Set up a local cluster
On macOS, the nodes need loopback addresses configured, as follows:
sudo ifconfig lo0 alias 127.0.0.3
sudo ifconfig lo0 alias 127.0.0.4
Start the first node as follows:
./bin/yugabyted start \
                --advertise_address=127.0.0.3 \
                --base_dir=/tmp/ydb-gcp-1 \
                --cloud_location=gcp.us-central-1.us-central-1a \
                --join=127.0.0.1
Start the second node as follows:
./bin/yugabyted start \
                --advertise_address=127.0.0.4 \
                --base_dir=/tmp/ydb-gcp-2 \
                --cloud_location=gcp.us-central-1.us-central-1a \
                --join=127.0.0.1
Third cloud - Azure
Note
These nodes in Azure will join the cluster in AWS (127.0.0.1)Set up a local cluster
On macOS, the nodes need loopback addresses configured, as follows:
sudo ifconfig lo0 alias 127.0.0.5
sudo ifconfig lo0 alias 127.0.0.6
Start the first node as follows:
./bin/yugabyted start \
                --advertise_address=127.0.0.5 \
                --base_dir=/tmp/ydb-azu-1 \
                --cloud_location=azu.us-east-1.us-east-1a \
                --join=127.0.0.1
Start the second node as follows:
./bin/yugabyted start \
                --advertise_address=127.0.0.6 \
                --base_dir=/tmp/ydb-azu-2 \
                --cloud_location=azu.us-east-1.us-east-1a \
                --join=127.0.0.1
After starting the yugabyted processes on all the nodes, configure the data placement constraint of the universe, as follows:
./bin/yugabyted configure data_placement --base_dir=/tmp/ydb-azu-1 --fault_tolerance=zone --rf 5
This command can be executed on any node where you already started YugabyteDB.
To check the status of a running multi-node universe, run the following command:
./bin/yugabyted status --base_dir=/tmp/ydb-azu-1
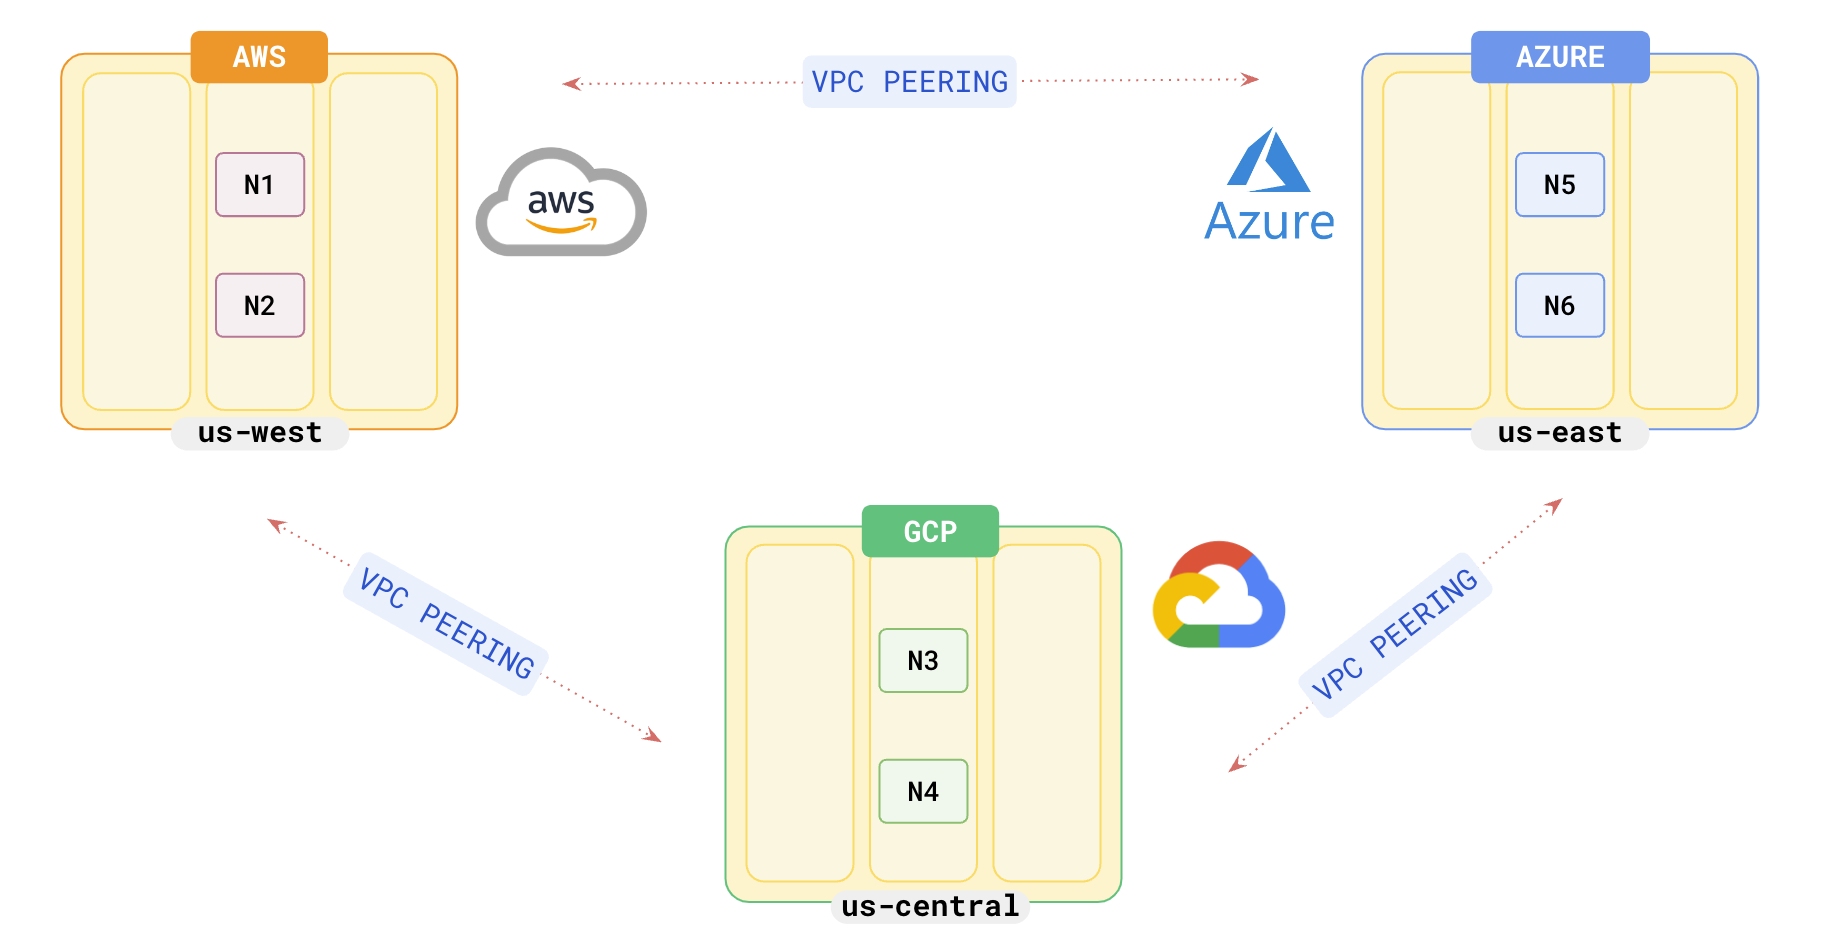
You should have a 6-node cluster with 2 nodes in each cloud provider as follows:

Multi-cloud application
Scenario
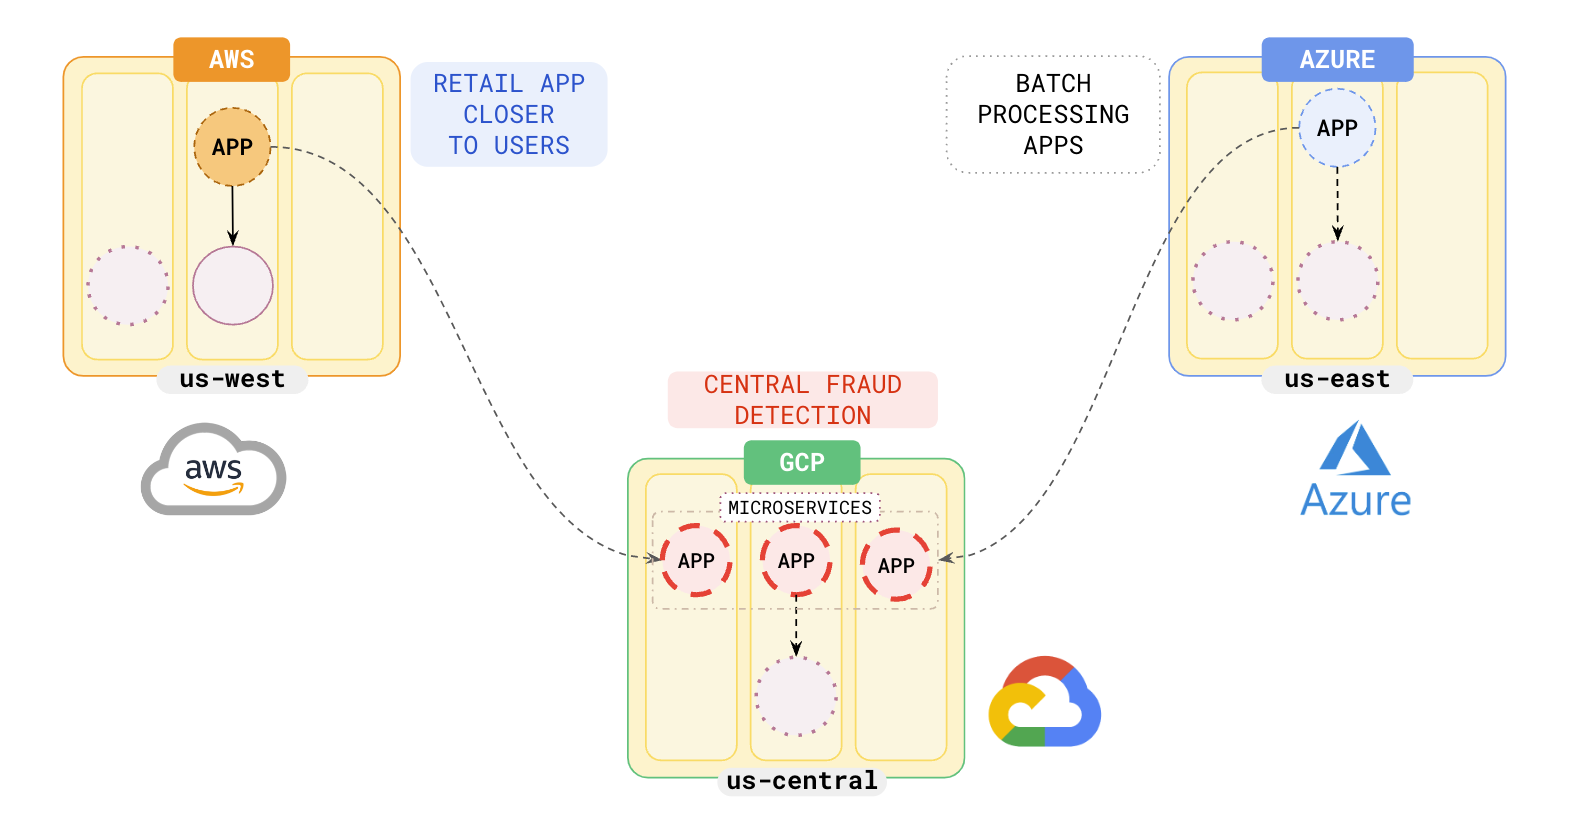
Suppose that you have retail applications that perform transactions and want to deploy them closer to users who are in the east and west regions of the US. Both applications need fraud detection, which needs to be fast.
Deployment
You can choose from a list of design patterns for global applications for designing your multi-cloud applications using the following setup.
As you want your retail applications to be closer to your users, you deploy them in the data centers at AWS (us-west) and AZU (us-east). As both systems require fast fraud detection, and as the regions are far apart, you can opt to deploy your fraud detection infrastructure on GCP as follows:

Hybrid cloud
You can also deploy your applications using a combination of private data centers and public clouds. For example, you could deploy your retail applications in your on-prem data centers and your fraud detection systems in the public cloud. See Hybrid cloud for more information.
Failover
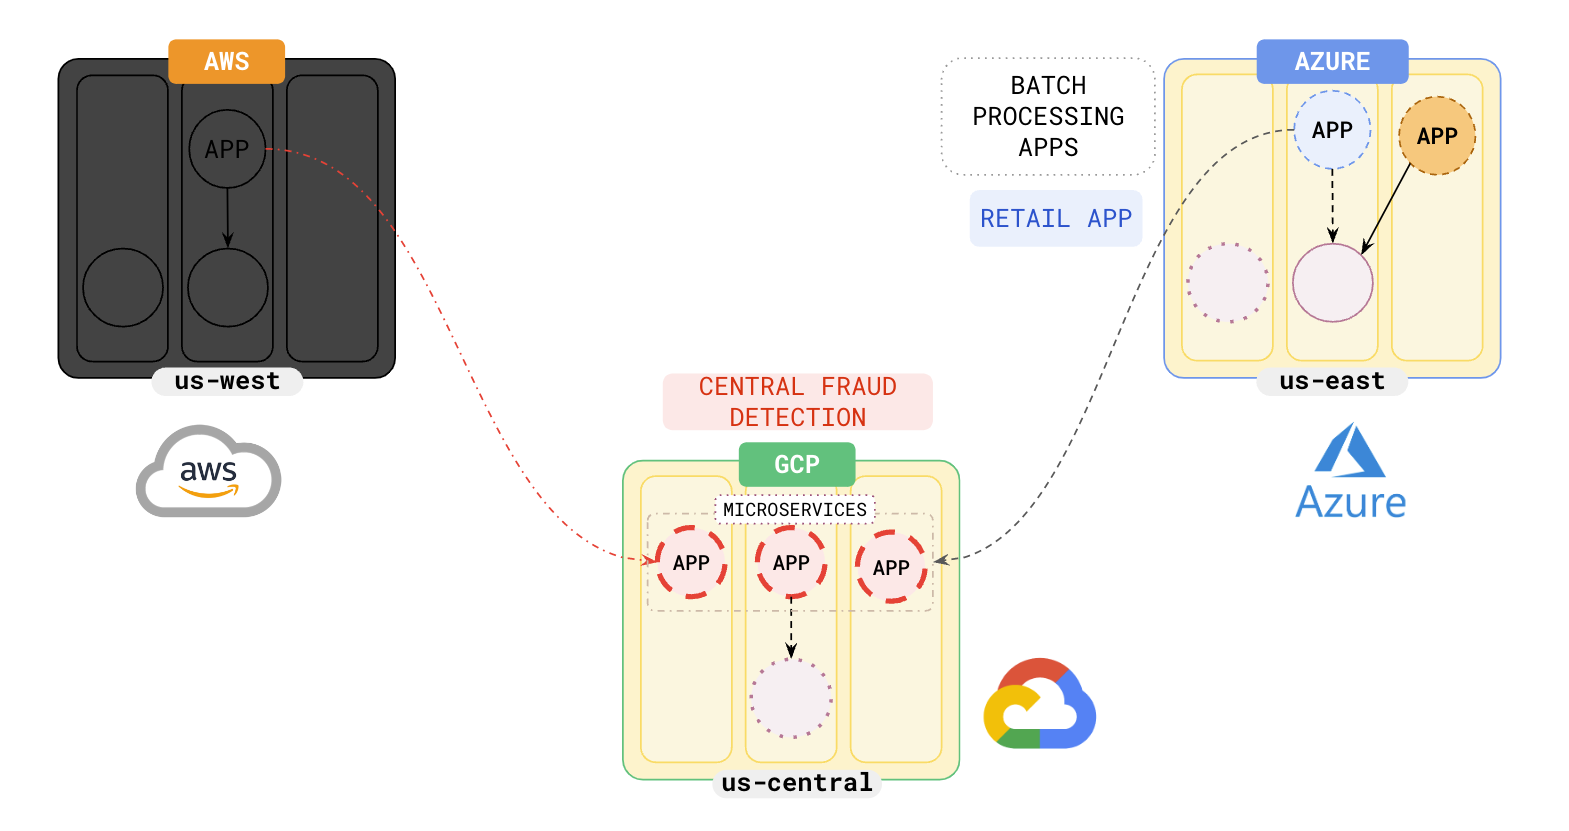
On a region failure, the multi-cloud YugabyteDB universe will automatically failover to either of the remaining cloud regions depending on the application design pattern you chose for your setup. In the above example, if you had set the order of the preferred zones to be aws:1 azu:2, then when AWS fails, applications will move to AZU and the applications will use the data in us-east to serve users without any data loss.

You could choose closer regions to avoid an increase in latency on failover.